Scheduled Reports
You can customize and schedule a variety of reports for your customers in your preferred format and timeframe. Reports will be sent via email as PDF or CSV attachments on a daily, weekly, monthly, or quarterly basis. You have the option to schedule multiple reports, including the Summary Report, Availability Summary Report, License Summary Report, and Outage Report.
Use case
As an MSP, you oversee IT monitoring for multiple customers, and you need to deliver regular performance insights. Manually creating reports for every customer is time-consuming, so you rely on customizable and scheduled reporting.
For instance, you schedule a Summary Report for Customer A every week, an Availability Summary for Customer B monthly, and an Outage Report for Customer C quarterly. With Scheduled Reports, you can automatically receive customer insights as PDF or CSV attachments, ensuring timely updates without extra effort.
Key benefits
With our customizable and scheduled reporting feature, you can:
- Tailor reports based on needs: Create reports in your preferred format (PDF or CSV) and only include the data that is most relevant to each customer.
- Automate delivery: Automate delivery of reports to be sent quarterly, monthly, weekly, or daily, ensuring timely updates without manual effort.
- Support various report types: Send various reports, such as a Summary Report, Availability Summary Report, License Summary Report, and Outage Report.
Adding a scheduled report
- Log in to your Site24x7 MSP Account.
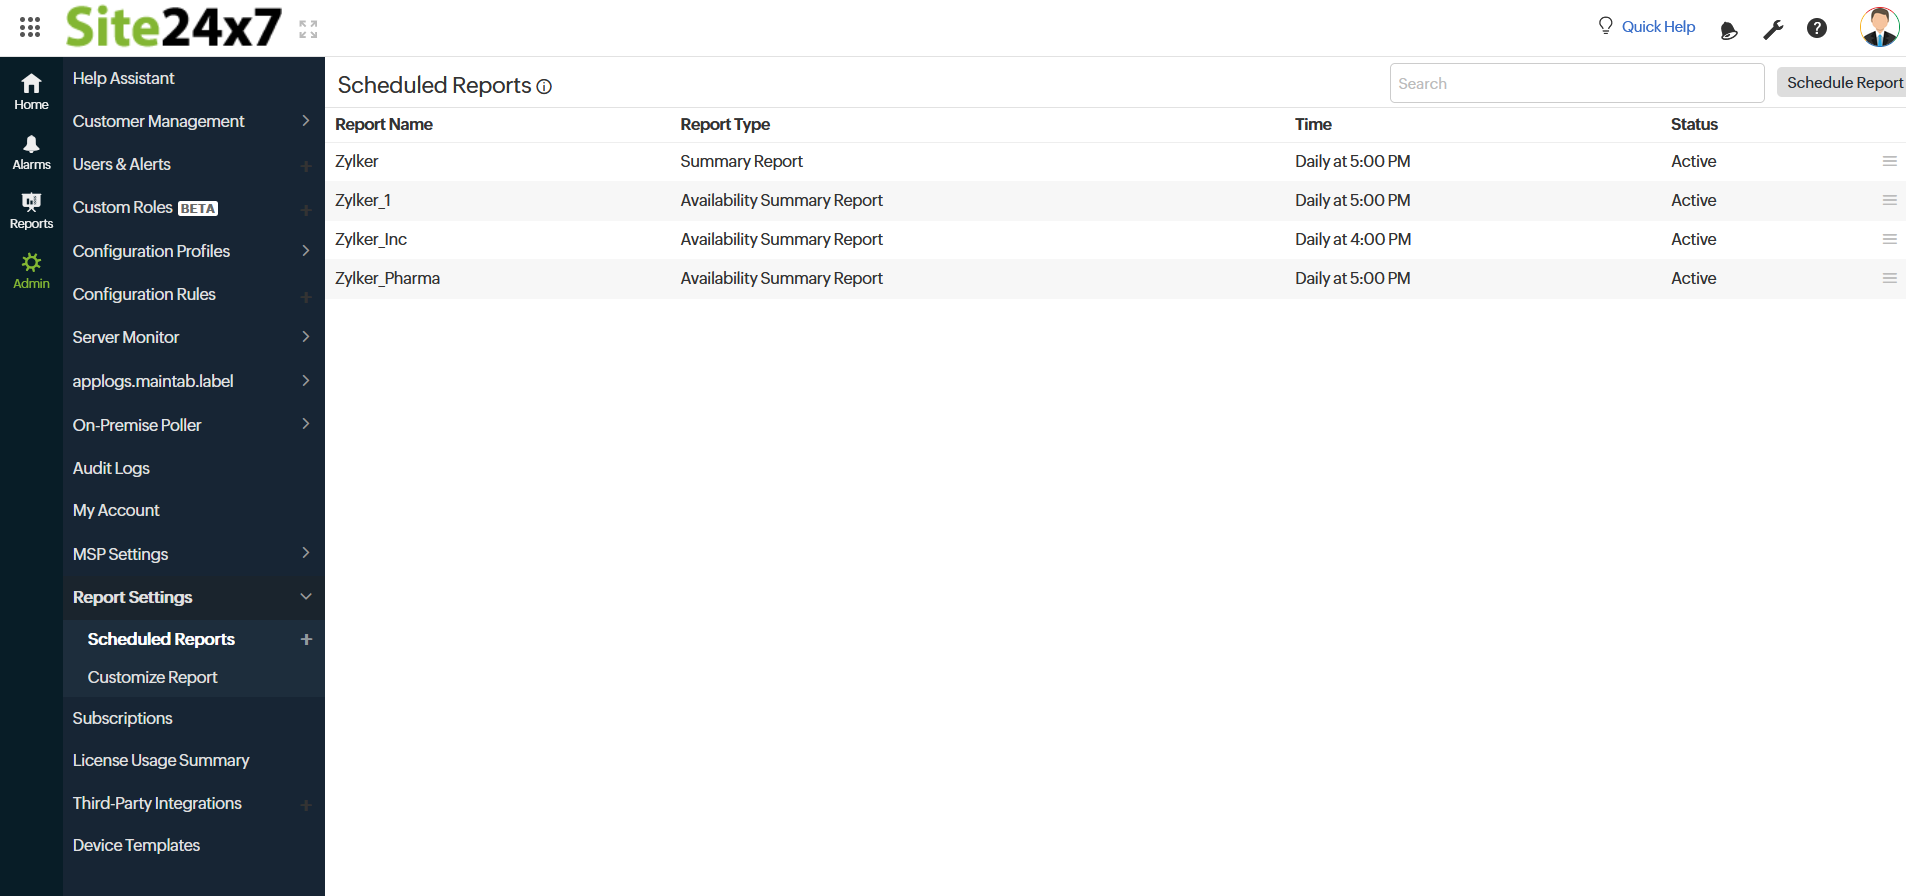
- Click Admin > Report Settings > Scheduled Reports (+) or click the Schedule Report button on the top right corner of the page.
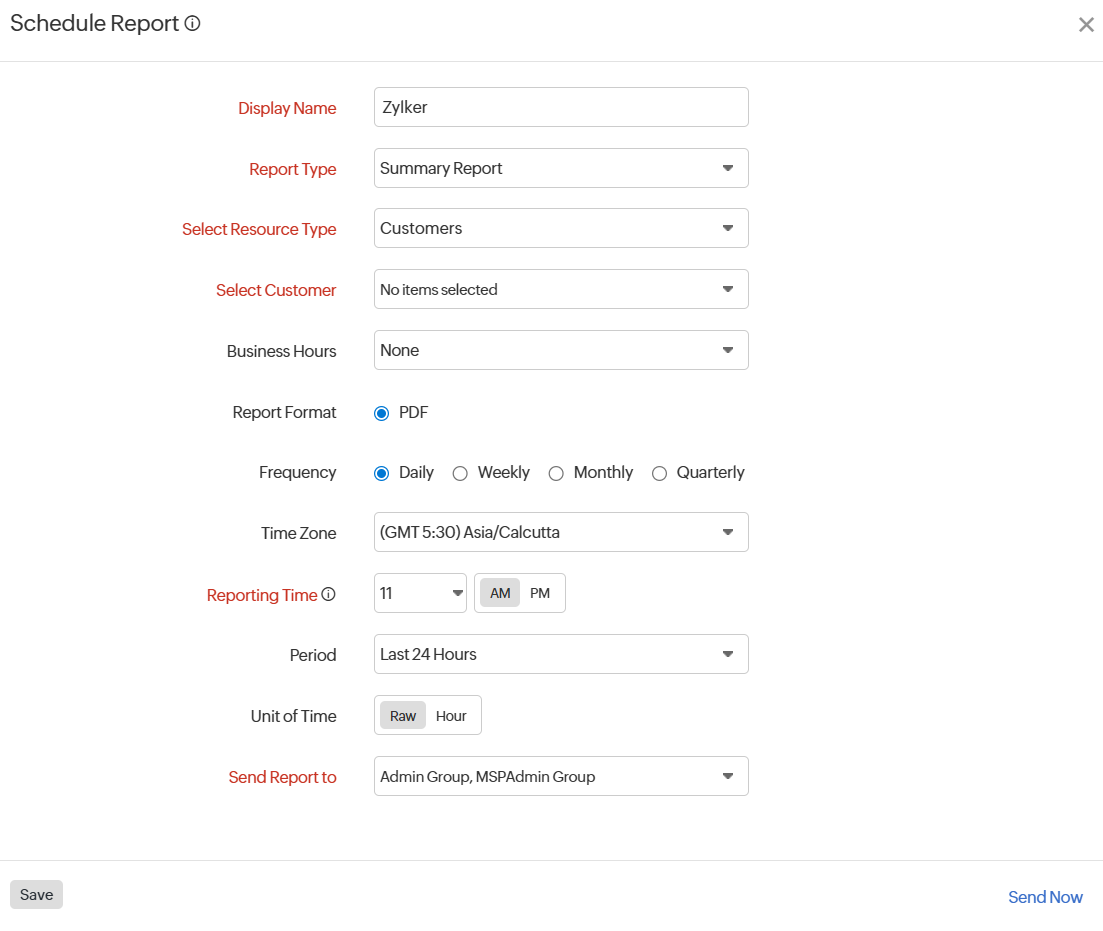
- Specify the following details to add the scheduled report:
- Display Name: Provide a name for the report to facilitate identification.
- Report Type: Choose the type of report that needs to be generated.
The different types of monitoring reports available are Summary Report, Availability Summary Report, Outage Report, License Summary Report, and Custom Dashboard.
Learn more about MSP reports.- Report Type: Summary Report, Availability Summary Report, Outage Report, and License Summary Report

-
Select Resource Type: Choose the resource type from the drop-down to define the scope of the report based on customer accounts. This helps tailor the report output to meet specific needs.
-
Customers: Allows you to select specific customers for whom the report should be generated. You’ll need to choose individual customers from the Select Customer drop-down.
-
Select Customer: Choose the customer for whom you would like the report to be generated.
-
-
All Customers: Includes data for all customers associated with your account in a single consolidated report.
Note- The License Summary Report is available only for individual customers. In this case, only the Select Customer drop-down will be visible, and you can choose a customer from the list.
- If you select All Customers, the report will be sent as a ZIP file, with each file inside covering reports for five customers.
- If the total file size exceeds 15 MB, a downloadable link will be generated.
-
-
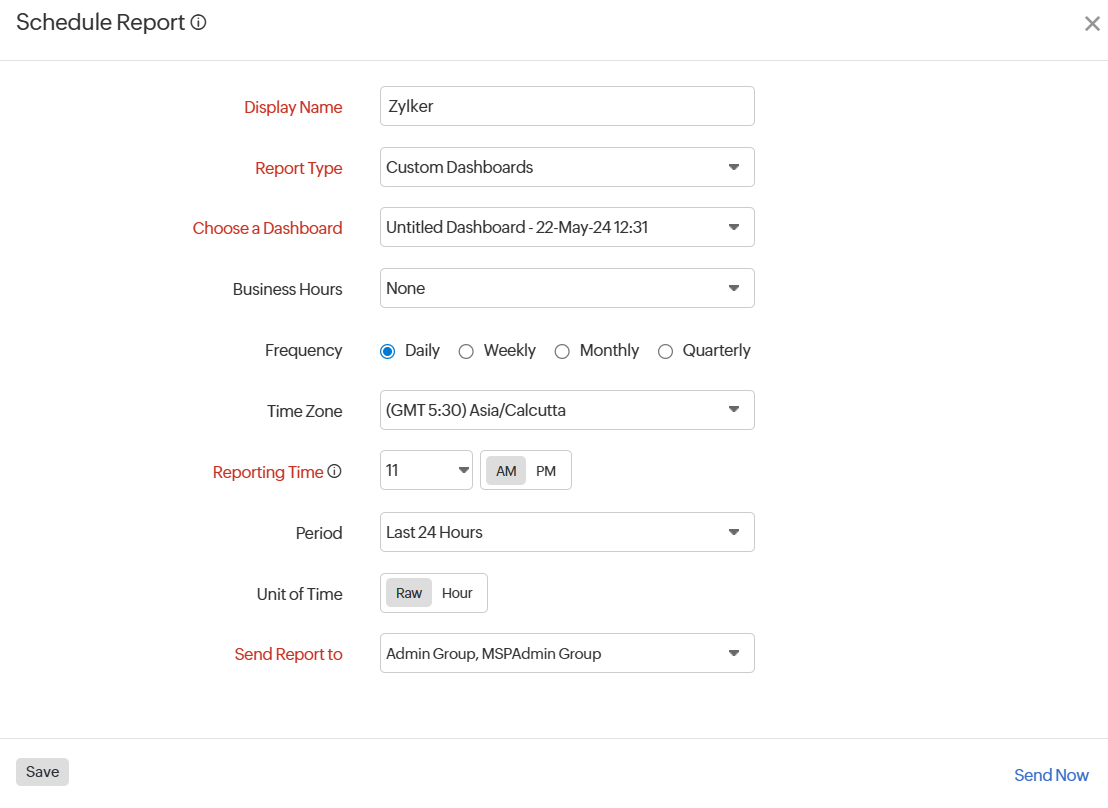
- Report Type: Custom Dashboard

- Choose a Dashboard: Select a specific dashboard for which the report should be generated.
- Report Type: Summary Report, Availability Summary Report, Outage Report, and License Summary Report
- Business Hours: Select the time-period that is most critical to your business.
- Report Format: Choose to export the report in CSV or PDF.
NoteThe Summary Report format will only be PDF. The Report Format option will be available for all the reports except for the Custom Dashboard.
- Frequency: The frequency of the report can be set on a daily, weekly, monthly, or quarterly basis. Learn more about frequency.
NoteIf you choose to schedule your report quarterly, specify the Business Quarter Months as per your need so that a quarterly report will be scheduled during the first month of every quarter. For example, upon selecting "Feb - May - Aug - Nov" as your default business quarter, the report will be scheduled at the specified date and hour of February, May, August, and November.
- Time Zone: You can use the time zone option to generate scheduled reports.
NoteWithout manual configuration, the time zone will automatically be set at the MSP level.
- Reporting Time: The exact time when you want the report to be generated for all the customer related MSPs by choosing your preferences from the drop-down menu.
- Period: You can choose the specific time frame of data that you want to include in the generated report.
For instance, if you select the Reporting Period as the last 30 days and set the Frequency to Weekly, a report will be generated every week, summarizing the data from the last 30 days. - Unit of Time: Choose between Raw or Hour.
- Raw: Provides data in its original, unaggregated form. Useful for granular details, in-depth analysis, or troubleshooting.
- Hour: Aggregates and summarizes data on an hourly basis. Useful for high-level reporting and trend analysis without excessive data clutter.
- Send Report to: Choose the necessary contact or the user alert group to whom the report should be sent.
- Click the Save button to save the Scheduled Report.
The report created will be automatically listed in the Scheduled Report screen along with the other reports that were created previously. - Click Send Now link to send the report to the associated MSP User Alert Group.
Note- This action will not save the data, but it will send the report to the associated MSP user alert groups.
- If a user in a User Alert Group isn’t associated with a particular customer, they’ll receive reports only for the customers they’re linked to—not for any unrelated customers.

Edit the report
- Navigate to Admin > Report Settings > Scheduled Reports.
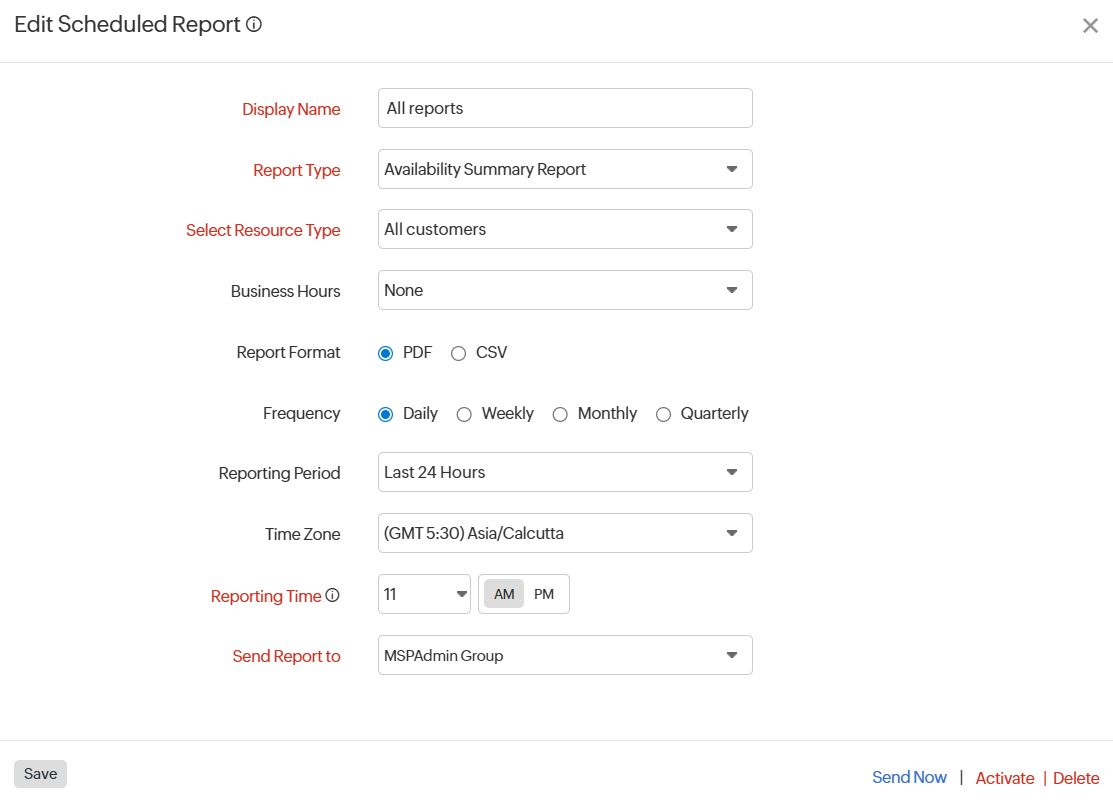
- Click the report which you want to update.
- Click the Save button to save the changes.

Suspend/Activate the report
- Click the report which you want to suspend or activate in the Schedule Reports screen.
- Click Suspend/Activate according to your preference.
Delete the report
- Click the report that you wish to delete.
- Click Delete in the Edit Schedule Report window.
Your report will be deleted.
