Monitor Group Resources Report
The Monitor Group (MG) Resources Report gives you a clear view of all monitors linked to a selected monitor group. It also includes the monitors that belong to any subgroups under that group. This helps you see everything in one place without switching between pages.
You can populate a scheduled report form to create a report task that would trigger MG Resources Report emails to your preferred alerting group at a set frequency. Furthermore, you can send the report on a daily, weekly, or monthly basis and attach the report as a CSV file.
Benefits of the MG Resources Report
The MG Resources Report provides you with the following benefits:
- Helps you understand what resources are tied to a specific monitor group.
- Shows subgroup resources in the same report, so nothing is missed.
- Keeps your audits simple and avoids manual checks.
- Lets you schedule regular updates, which saves time for large setups.
- Keeps teams aligned because everyone receives the same report.
Use case
The MG Resources Report helps when you manage a large setup where monitor groups are nested and handled by different teams. For example, imagine you have a main AWS Production group with several subgroups such as EC2, RDS, and Load Balancers. Each subgroup has its own set of monitors created and updated by different engineers. Over time, it becomes hard to track which monitors are part of the main group and what’s coming in through the subgroups.
The MG Resources Report gives you a single view of all these monitors, so you can quickly check if everything is organized as expected. It also helps during audits or onboarding, because teams can see the entire structure and avoid missing monitors that sit deeper in the hierarchy. Scheduling this report ensures stakeholders receive a regular summary without having to log in or run separate checks.
Schedule MG Resources Report
- Log in to Site24x7.
- Navigate to Admin > Report Settings > Schedule Reports.
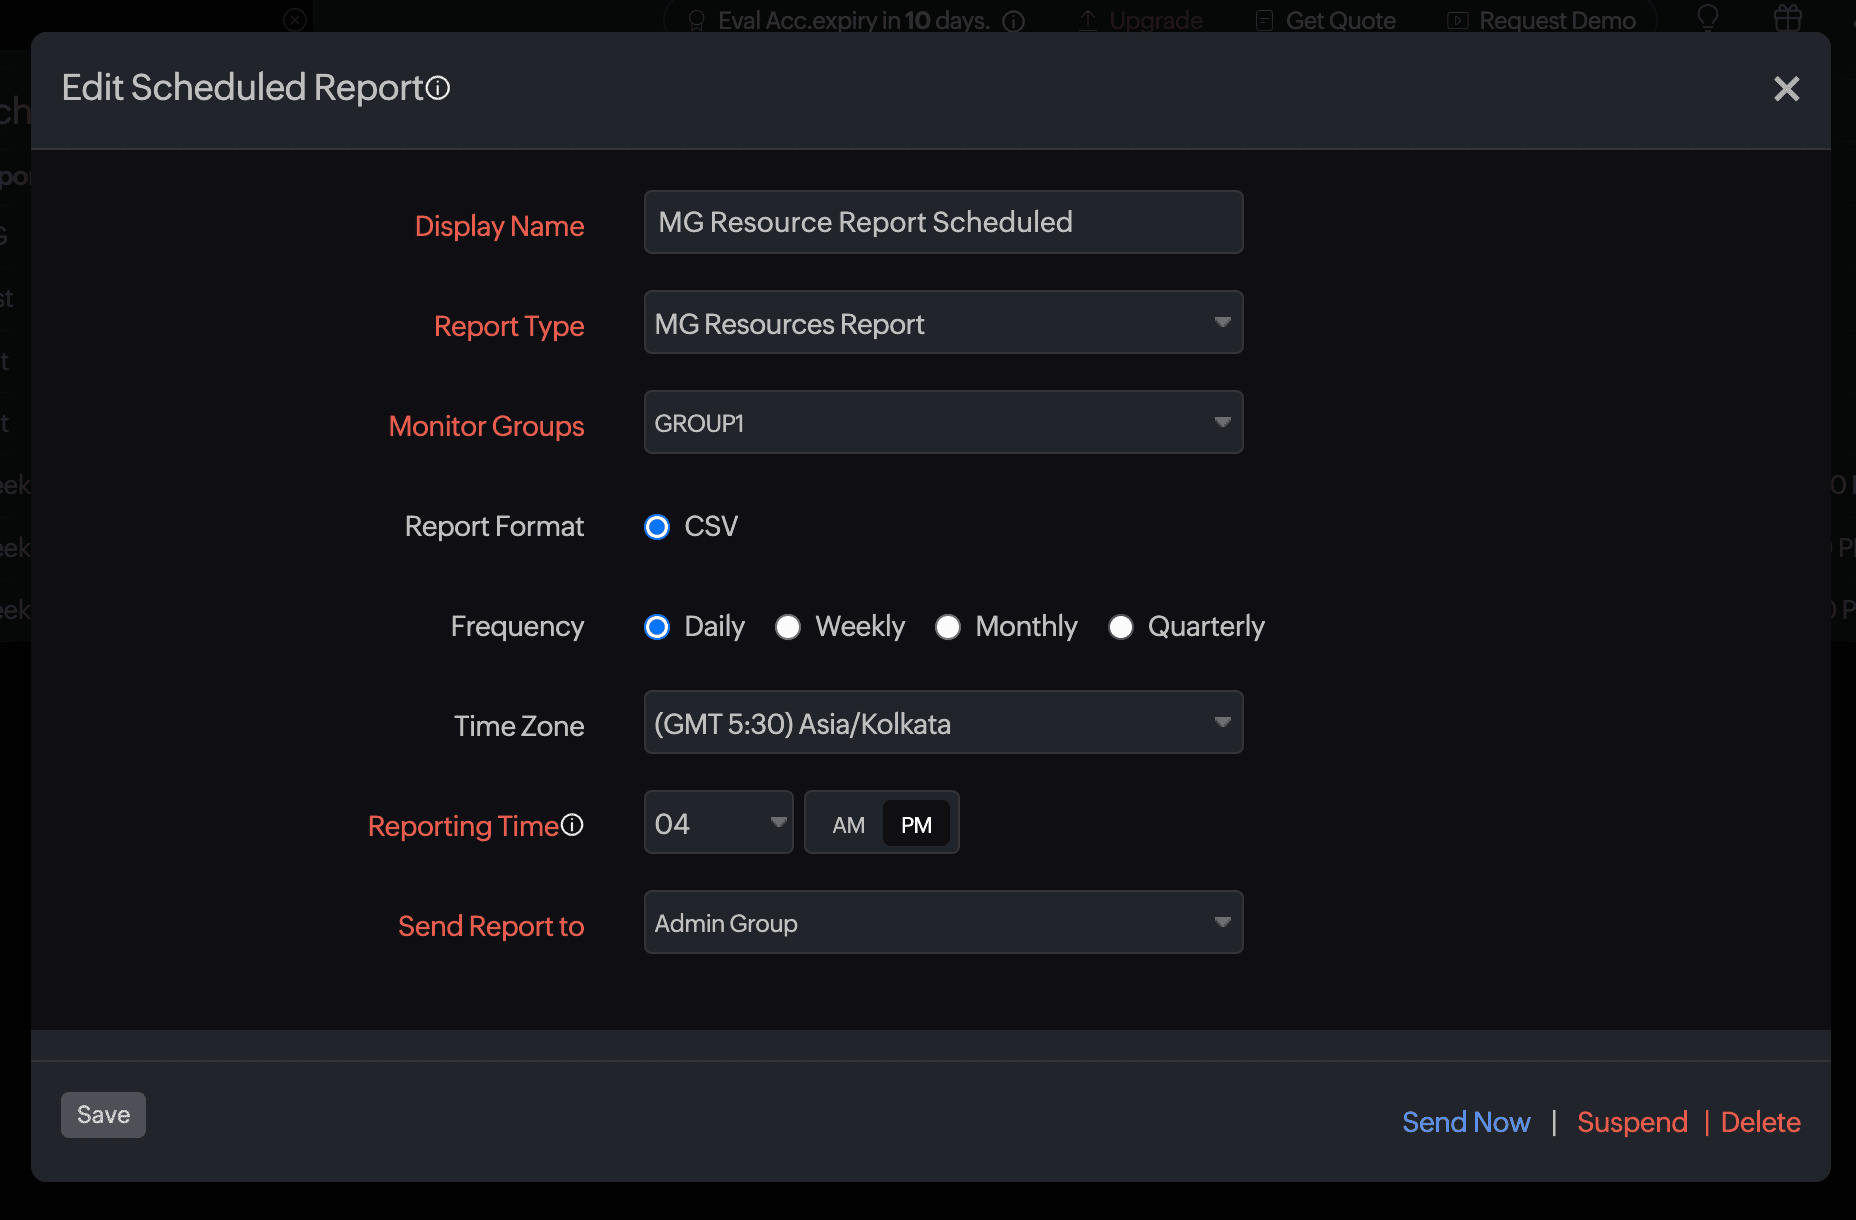
- In the Schedule Reports page, enter the following details.
- Display Name: Provide a display name.
- Report Type: Select MG Resources Report.
- Monitor Groups: Choose the applicable monitor groups.
- Report Format: The reports can be exported in CSV format. This option is selected by default.
- Frequency: The frequency of the report can be set on a daily, weekly, monthly, or quarterly basis.
- Time Zone: Select the applicable time zone option to generate scheduled reports.
- Reporting Time: Set the exact date and time when you want the report to be generated.
- Send Report to: Choose the necessary contact to whom the report should be sent.
- Click Save.
- Click Send Now to trigger the report instantly to the designated user alert group.

The report created will automatically be listed in the Scheduled Reports page along with the other reports that were previously created.
Suspend the report
To suspend a report follow these steps:
- Click on the report that you want to suspend in the Schedule Reports page.
- Click Suspend.
- The suspended status of the report will be displayed under Status in the Scheduled Reports page.
Delete the report
To delete a report follow these steps:
- Click on the report that you want to delete in the Schedule Reports page.
- Click Delete in the Edit Schedule Report page.
Related topics