Authenticate and monitor Azure resources using Custom App via Management group
Follow the instructions given below to authenticate Site24x7 to monitor your Azure resources using a custom application via Management group. Authenticating via a management group creates separate Site24x7 Azure monitors for each Azure subscription.
Step 1: Create an Microsoft Entra ID application
- Log in to the Microsoft Azure portal and navigate to the Microsoft Entra ID section.
- Click + Add > App Registration.
- In the Register an application page, enter the following details:
- Name: Provide a unique name for identification purposes. Example: Site24x7 Azure App.
- Supported account types: Select any one of the below mentioned options:
- Accounts in this organizational directory only (Single tenant)
- Accounts in any organizational directory (Any Azure directory - Multitenant)
- Account in any organizational directory (Any Azure AD - Multitenant) and personal Microsoft accounts (Example: Skype, Xbox)
- Redirect URI (optional): Select Web from the drop-down and enter a valid URL. Example: https://localhost:8080.
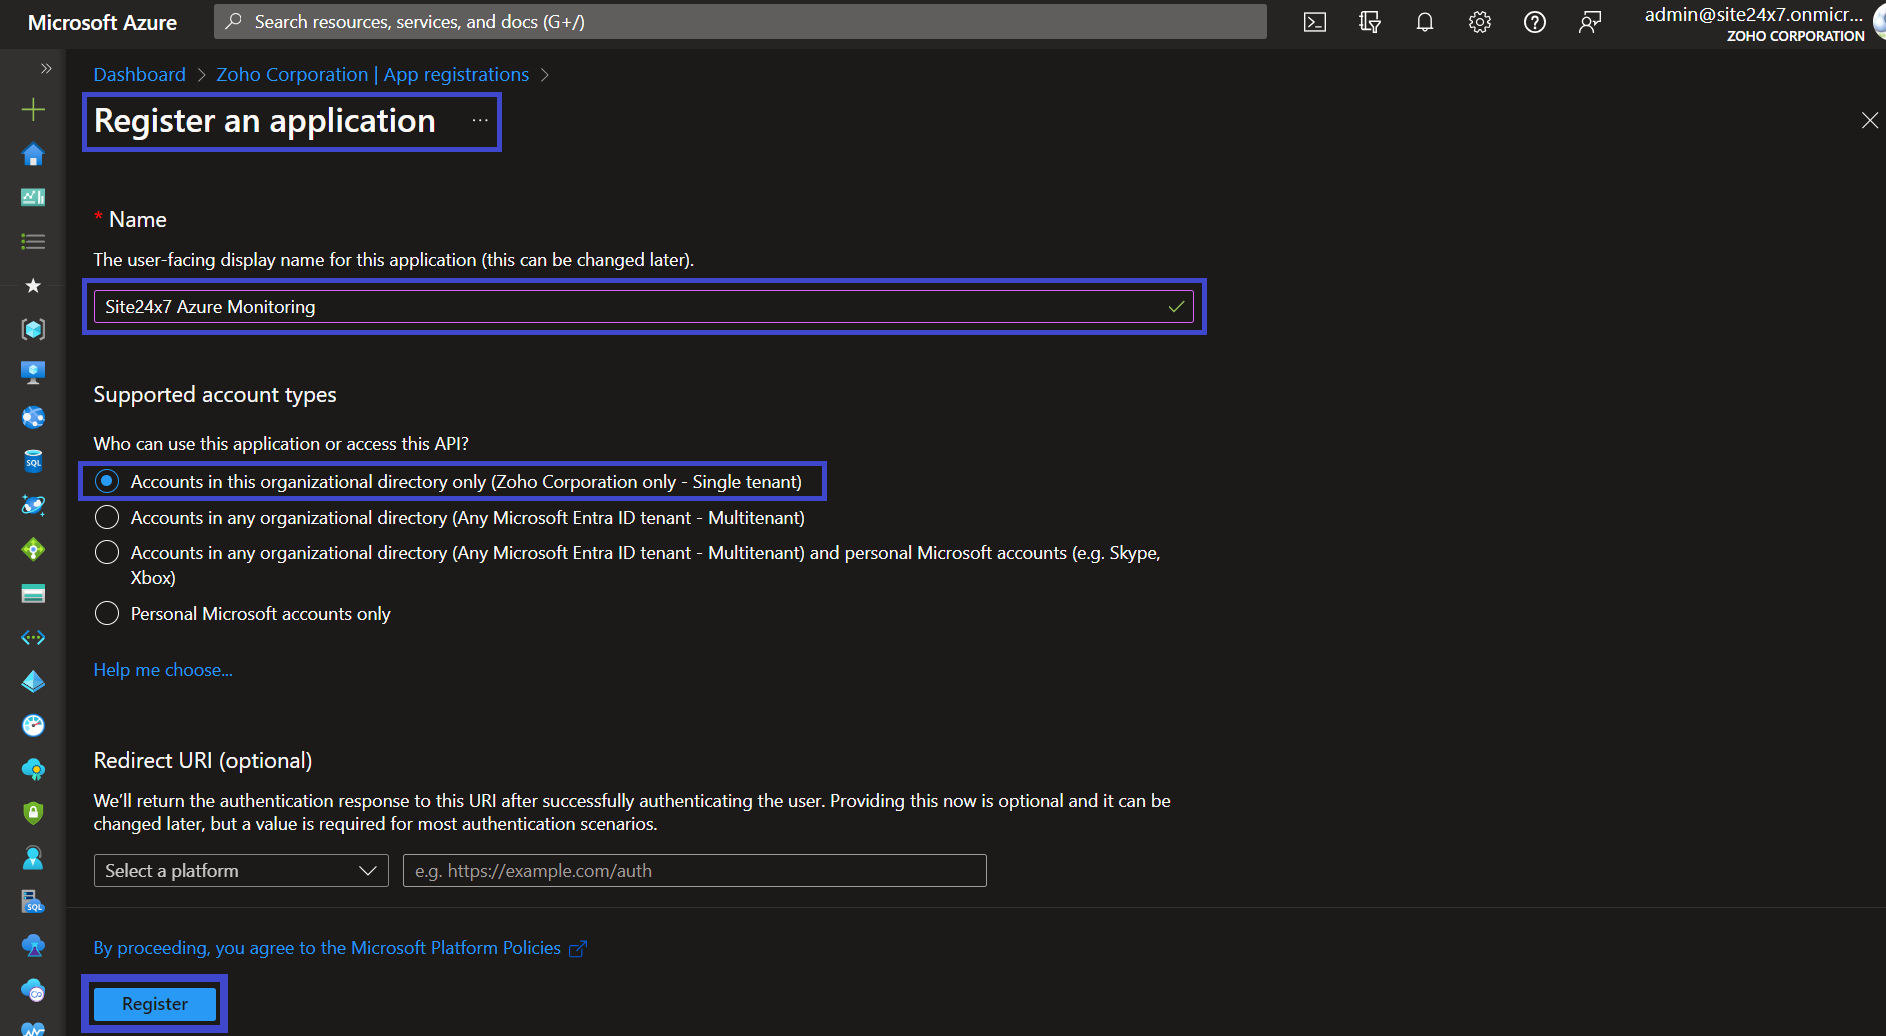
- Click Register.
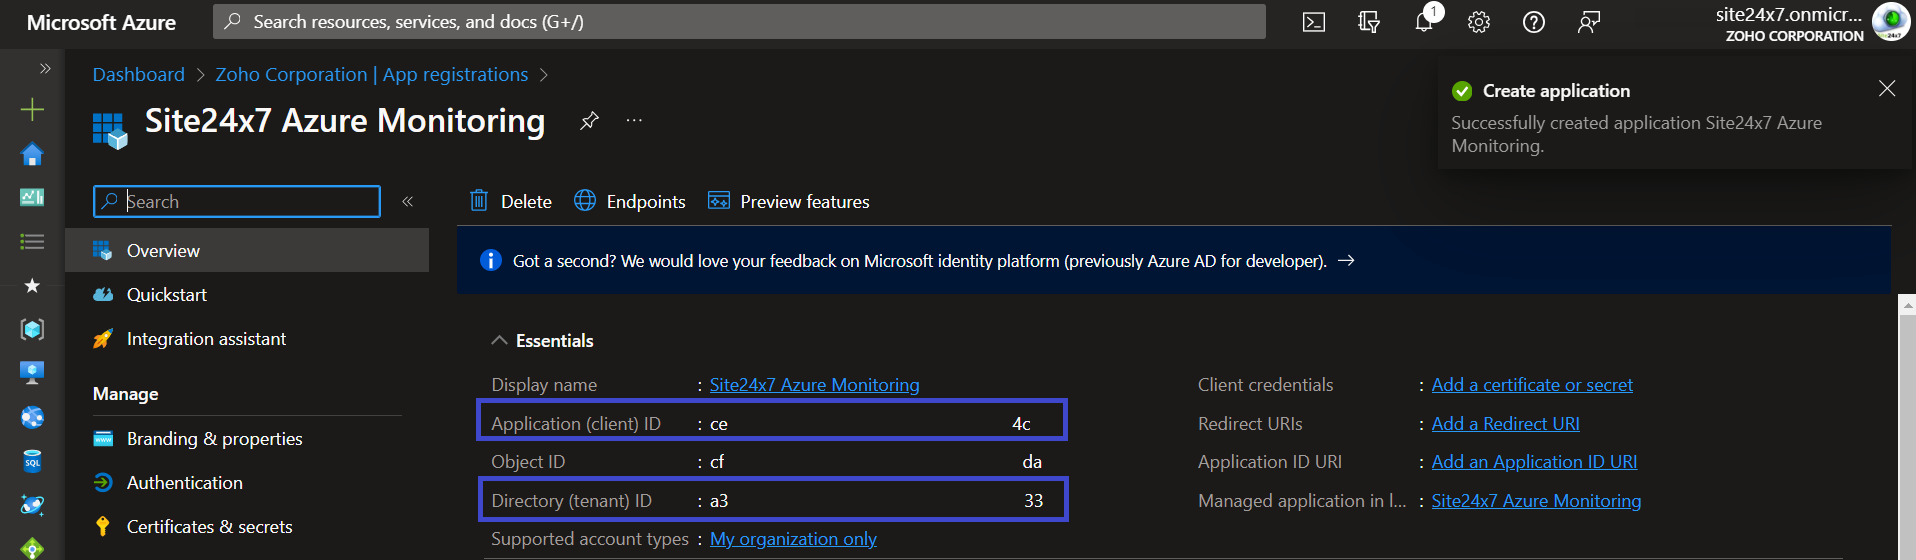
- Once the application is registered in the Azure portal, you will be taken to a page with information about the application. Copy the Directory (tenant) ID and Application (client) ID and save them for later use.
- Under Manage, click Certificates & secrets.
- Under Client Secrets, click + New client secret.
- In the Add a client secret window, provide a Description. Select your preferred period in the Expires field, and click Add.
- Copy the client secret value in the Value column and save it for later use. Copy and paste the value as soon as you see it since the value disappears in a short span of time.
NoteMake sure you copy the value under the Value column and not the Secret ID column.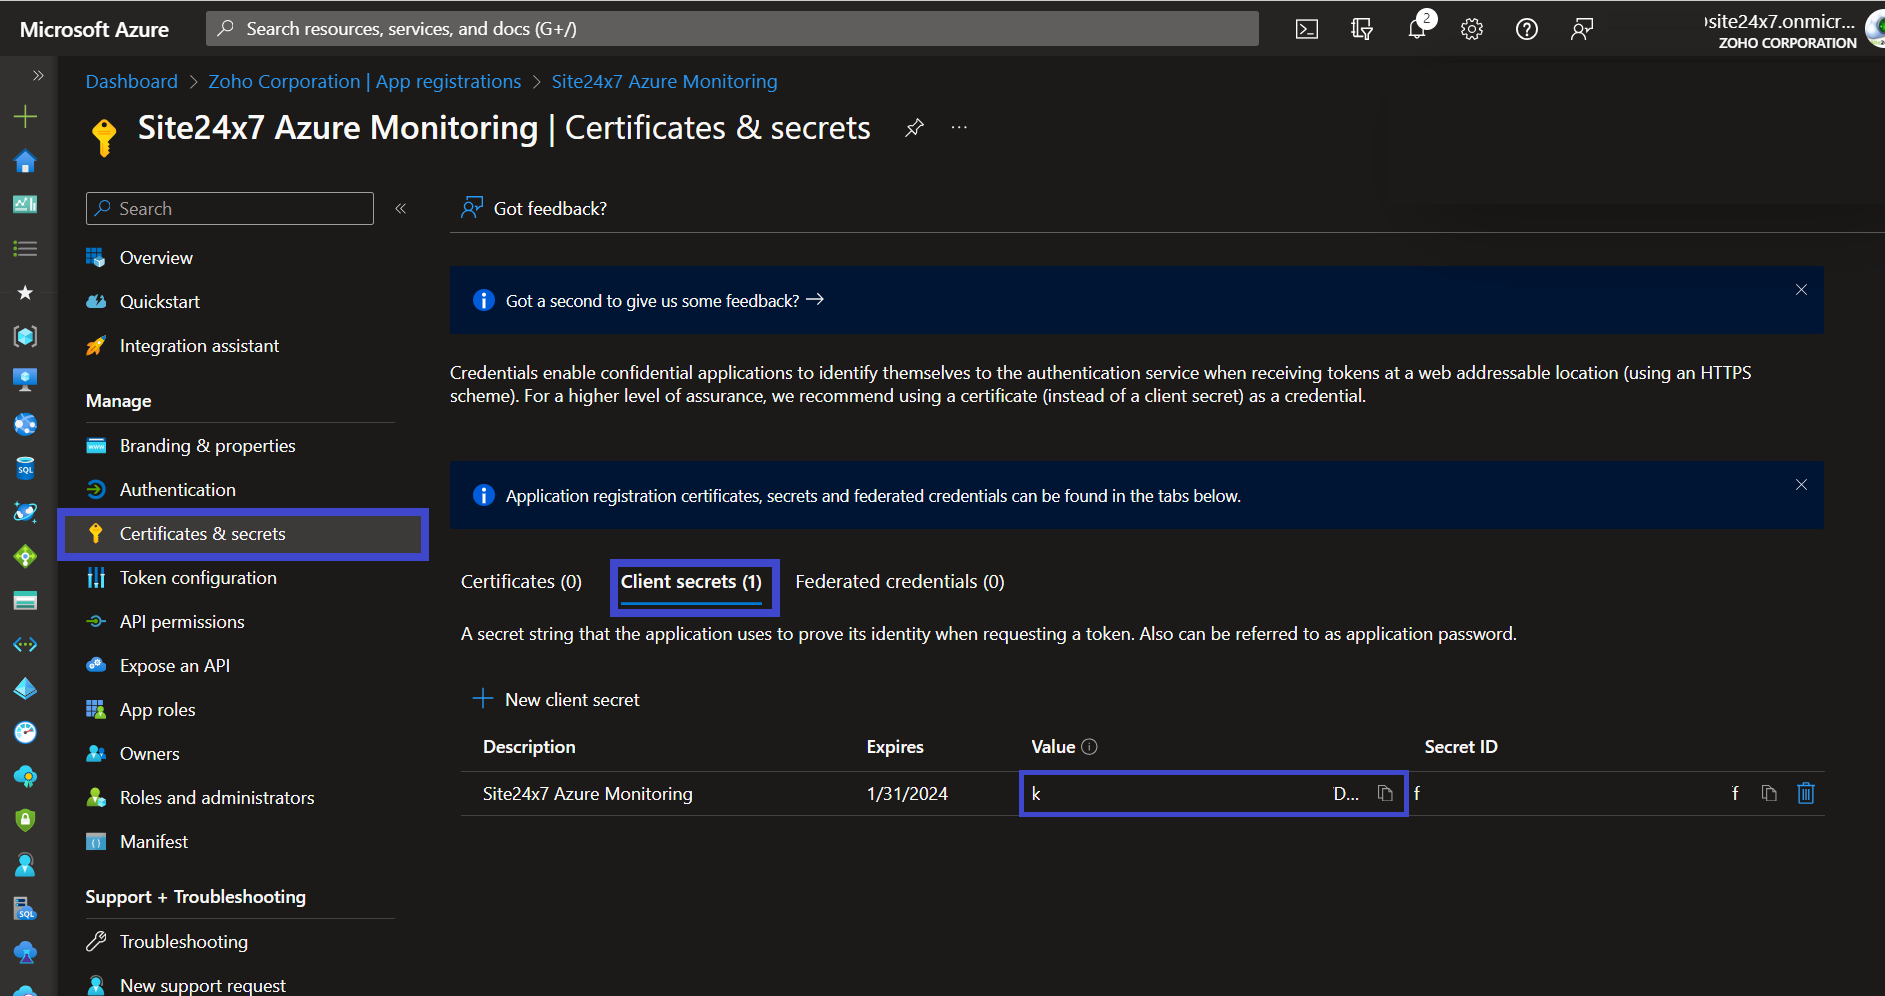

While entering the validity of the client secret in the Expires field, remember that once the client secret has expired, you will have to create a new client secret by following the above instructions and update it in the Site24x7 Azure monitor as per the instructions in our knowledge base document.
Step 2: Providing the necessary permissions to the Custom App
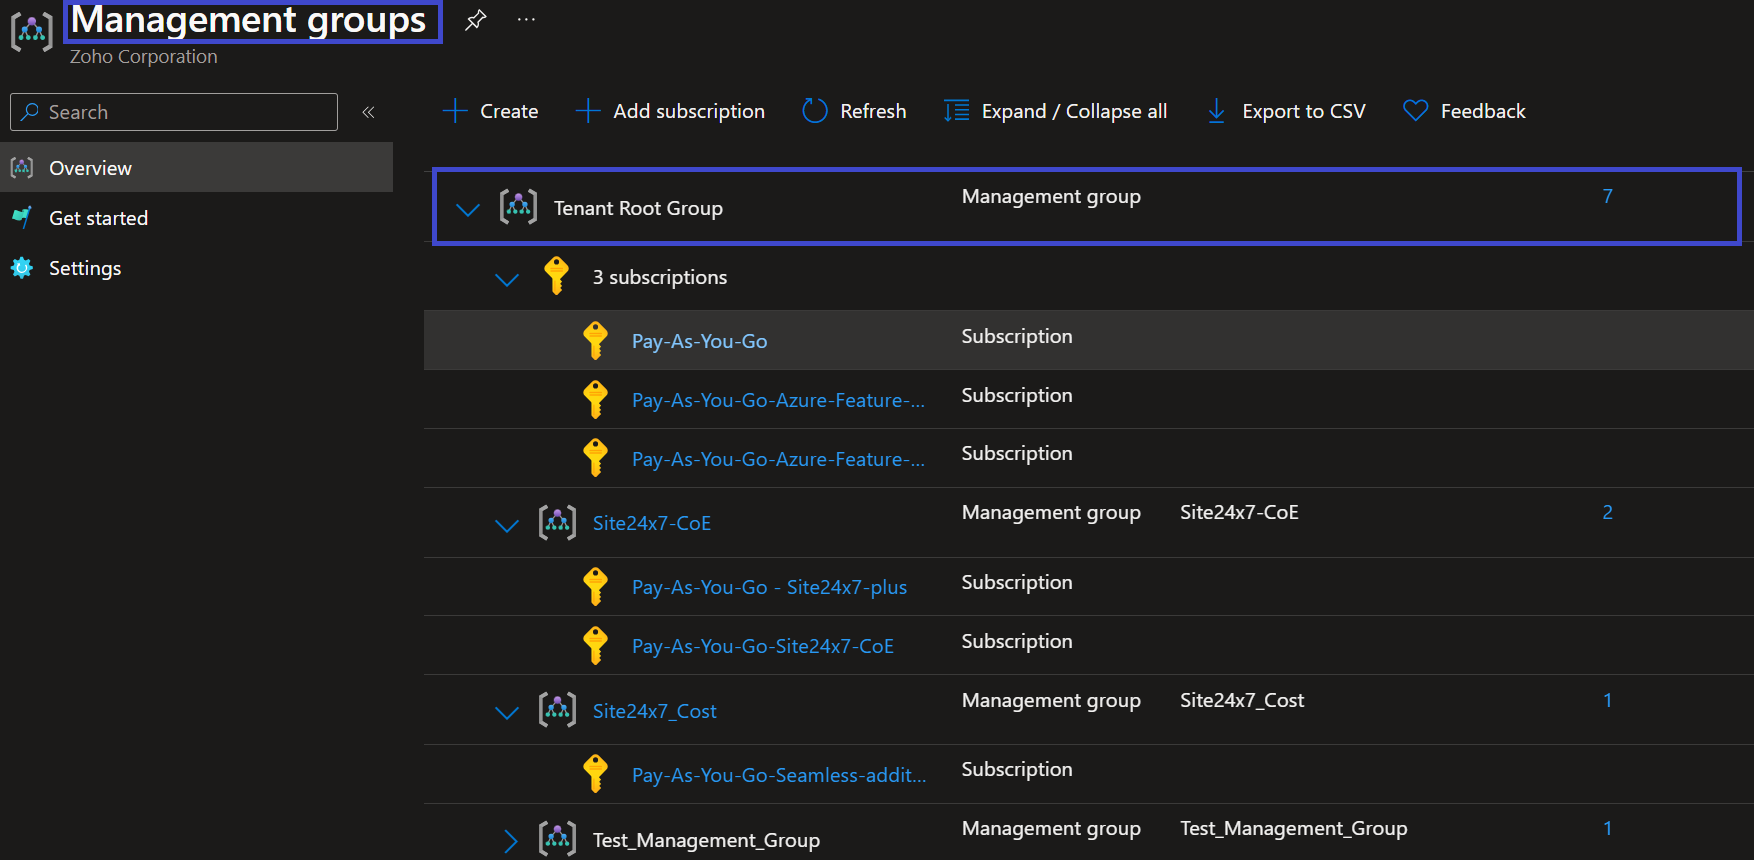
- Go to Azure home page and then navigate to Management Groups. Select the Management group under which the subscriptions you want to monitor are listed, and then click Access Control (IAM) > + Add > Add role assignment.
- In the Add role assignment page, choose either Reader role from the Job function roles tab or Contributor* role from the Privileged administrator roles tab. Then, click Next.
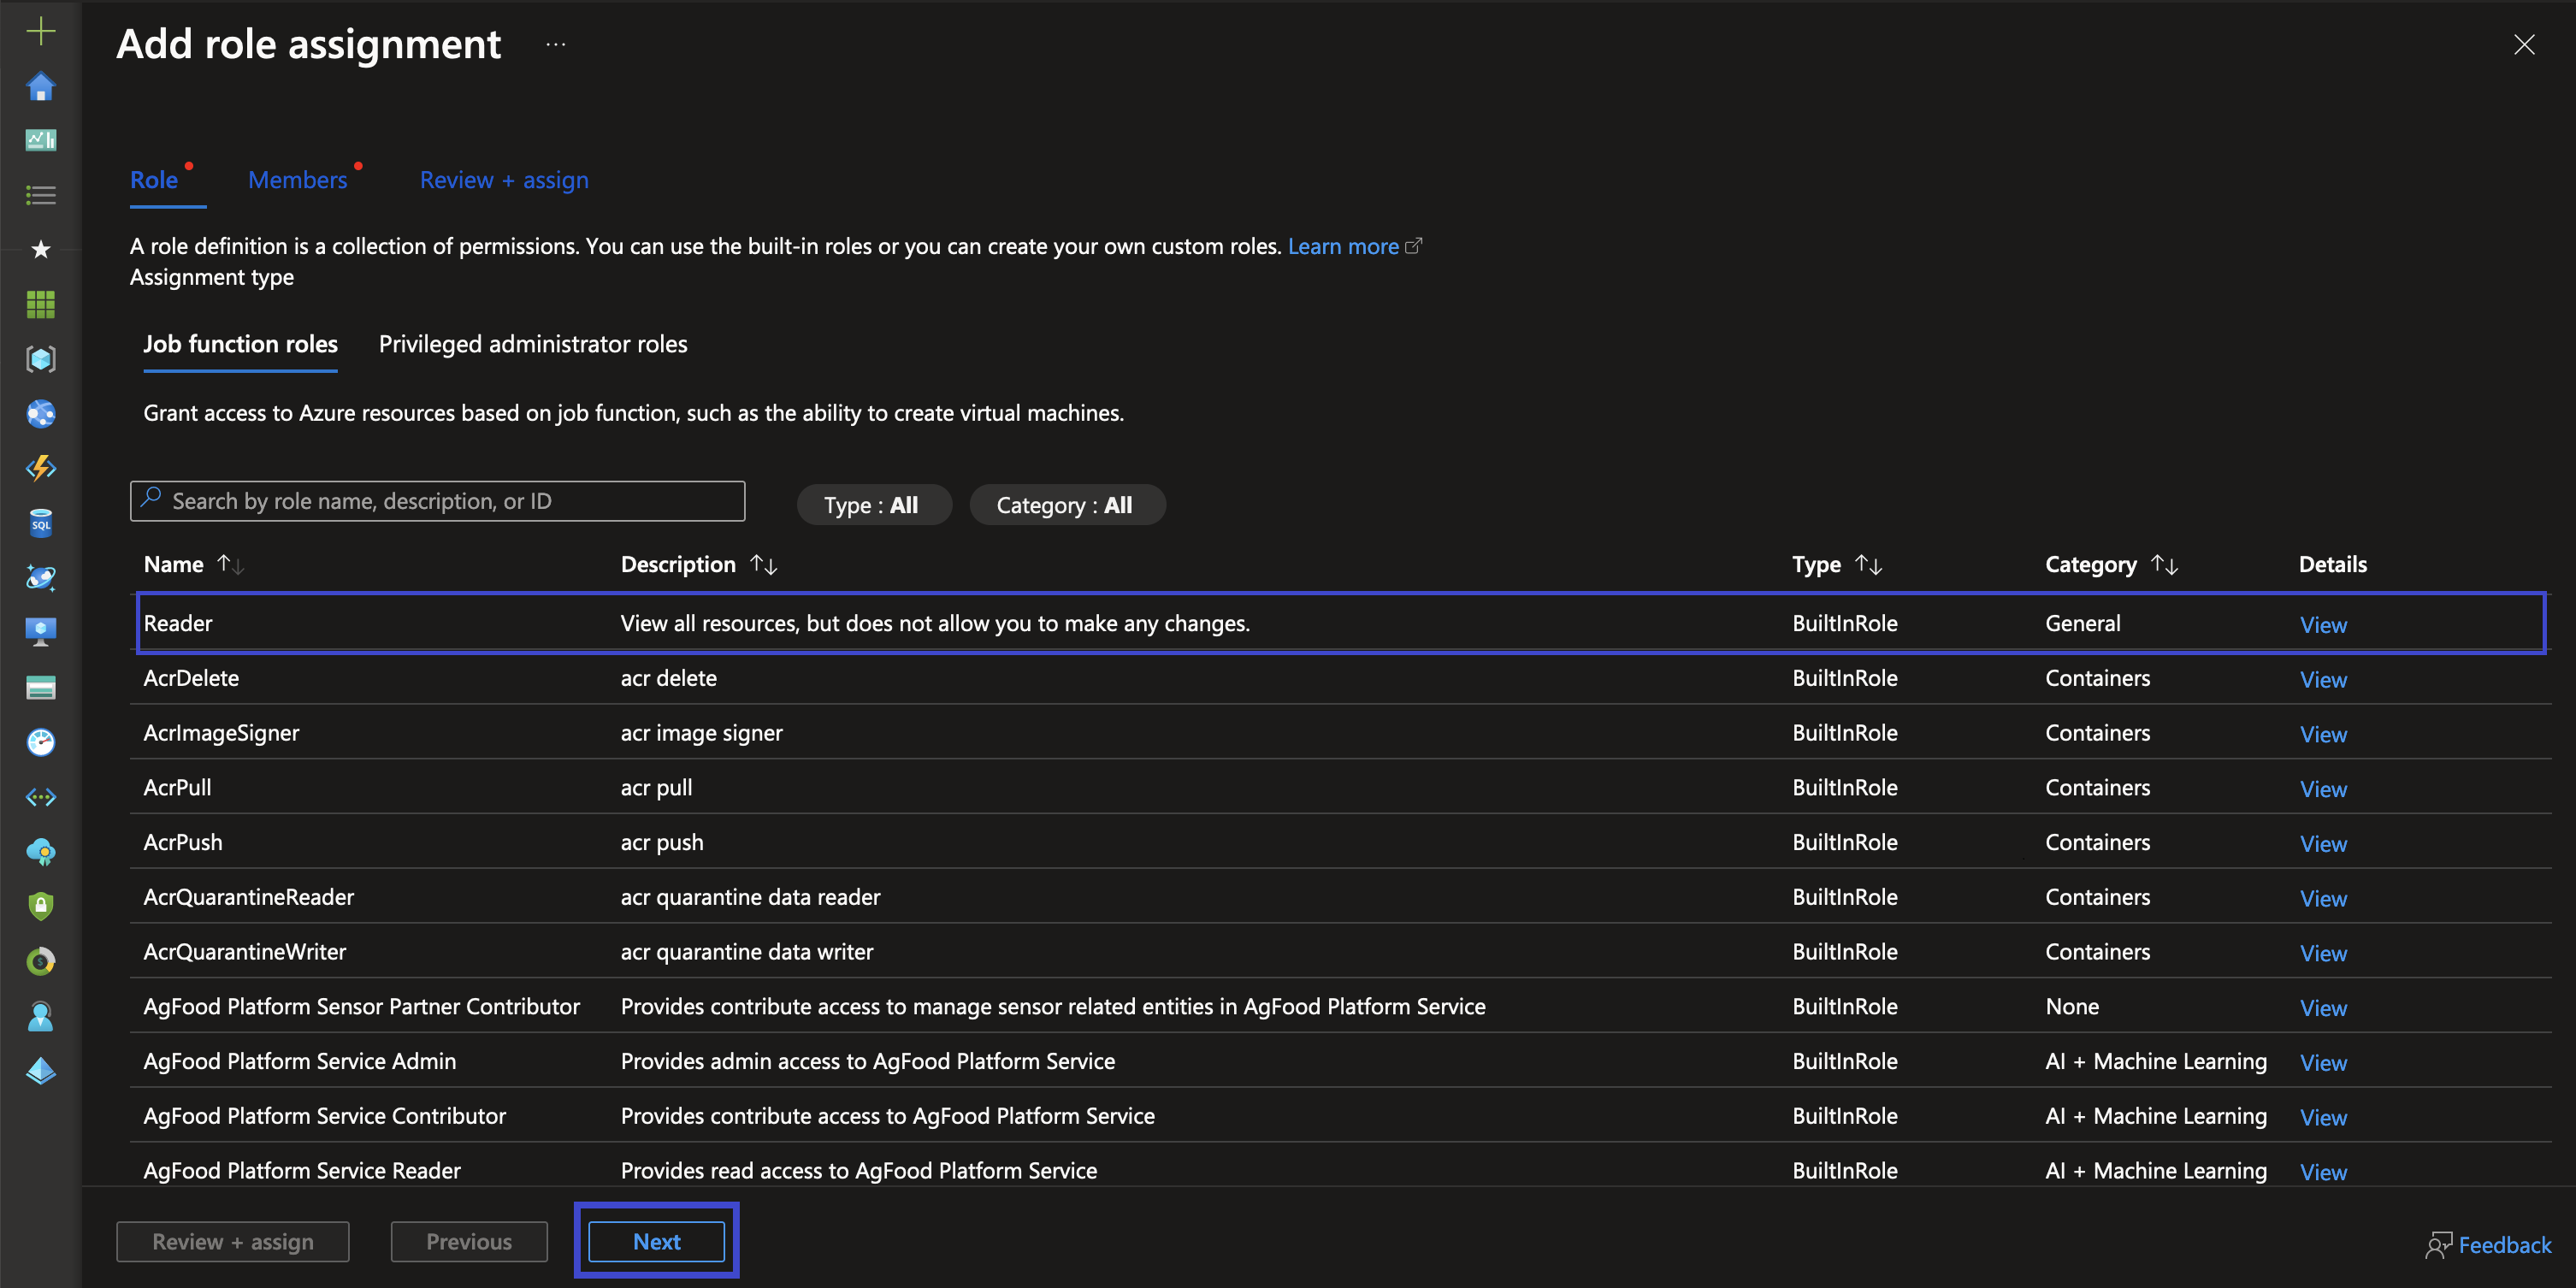
Note* - Though the Reader role is enough for monitoring purposes, to add IT automation and write operations in the Azure portal, Contributor role is required. - Click + Select members from the Members tab. In the right pane, select the application you have created. Click Select.
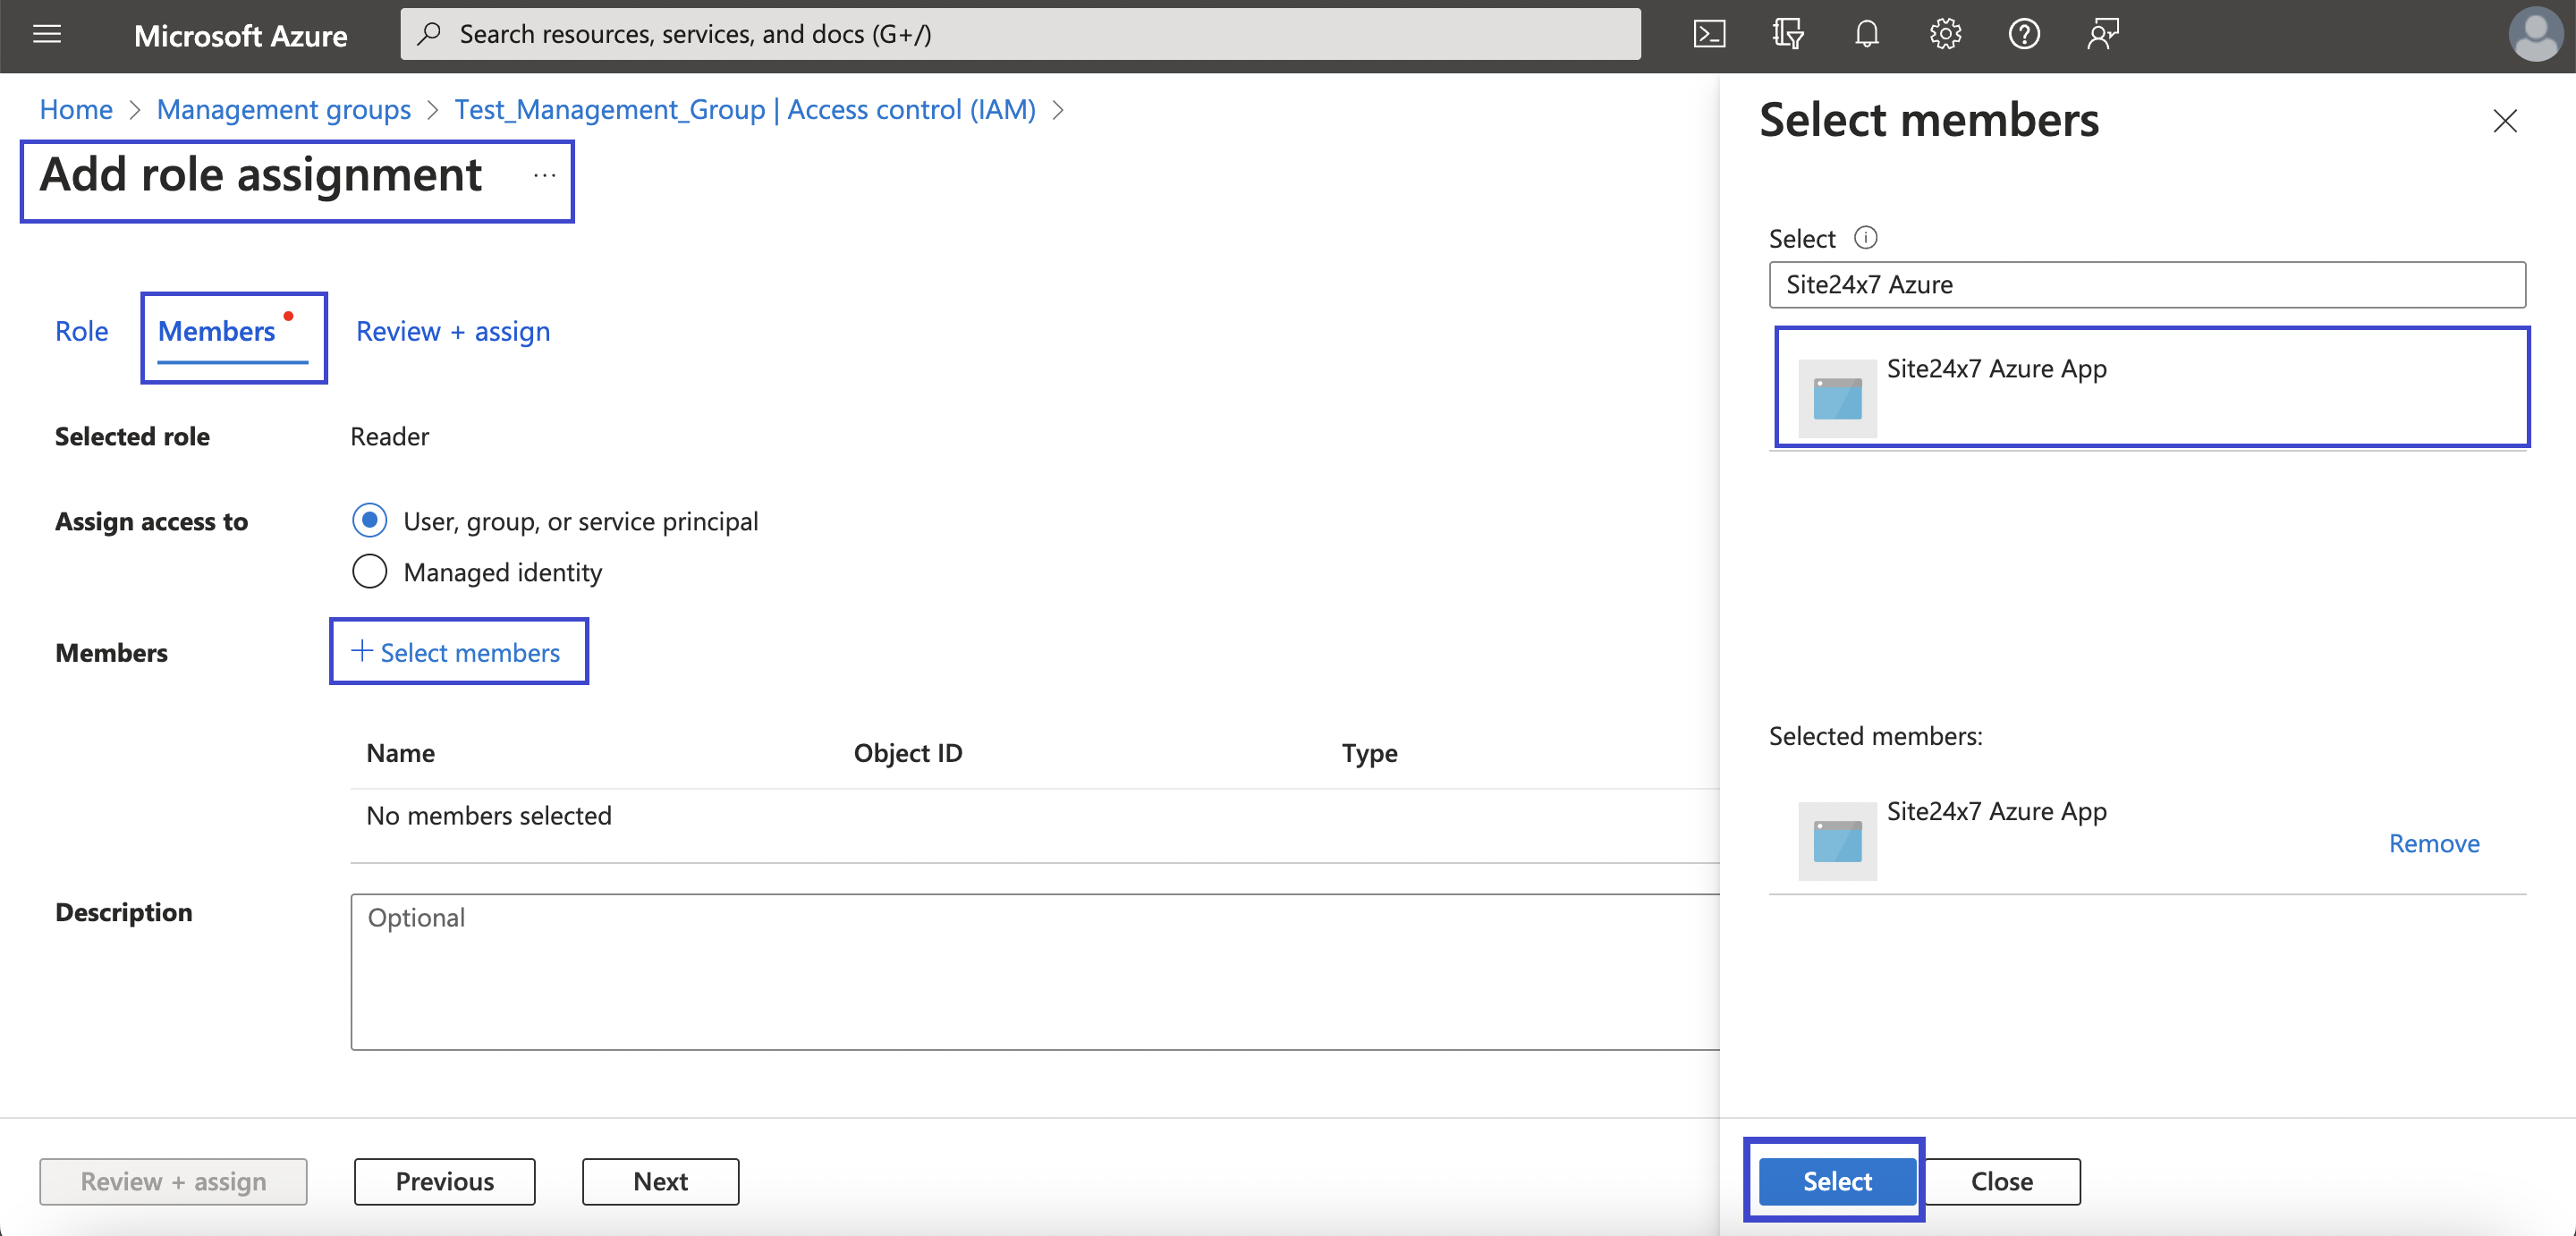
- Your application's name will now be added to the Members field. Click Next.
- In the Review + assign tab, verify your details, and then click Review + assign.
- Once you have completed the above steps, go to Site24x7's Add Azure monitor page and add an Azure monitor using the Tenant ID, Application ID, and the client secret value generated in Step 1.
Note
Once the required role is applied to the Management group level, it will be applied to all the descendant Subscriptions automatically. Also, if any new Subscriptions are added to the tenant, attach the Subscriptions to the respective management group.
Creating an Azure monitor with a custom application via Management Group creates each subscription as an individual monitor. To view the dashboards like the Service View or Inventory dashboard, click the respective subscription > the subscription's monitor page > the dashboard you want to view in the left navigation pane.