Freshservice Integration
Freshservice is an IT service management (ITSM) tool that helps automate tasks and manage incidents efficiently. All the alerts raised from Site24x7 will be tracked as incidents in Freshservice.
Prerequisites for integrating with Freshservice
- You need an active account in Freshservice.
- You need to generate an API integration key from the Freshservice web client.
How to integrate from Site24x7
- Log in to Site24x7.
- Navigate to Admin > Third-Party Integration > Freshservice.
- Provide the following details in the integration form:
- Integration Name: Provide a name for the integration.
- Domain Name: Provide the domain for which you wish to create this integration.
- API Key: Freshservice API helps connect your Freshservice and Site24x7 accounts. You can associate multiple Freshservice API keys with your Site24x7 account. To generate an API key, log in to Freshservice. Navigate to Profile and click Generate API Key.

Fig 1. Profile Settings in Freshservice.
Fig 2. Your API key in Freshservice. - Message Title: Use the $ tag to customize the message title of your Site24x7 notification.
From the Message Title section, you can choose Incident Parameters or Custom Parameters. Refer to this knowledge base to know more details about incident and custom parameters. If you choose to send custom parameters, you can opt to customise the description or provide custom JSON to change the properties.
Custom Description: For additional parameters to be included in the description of the alerts sent, use the custom description section.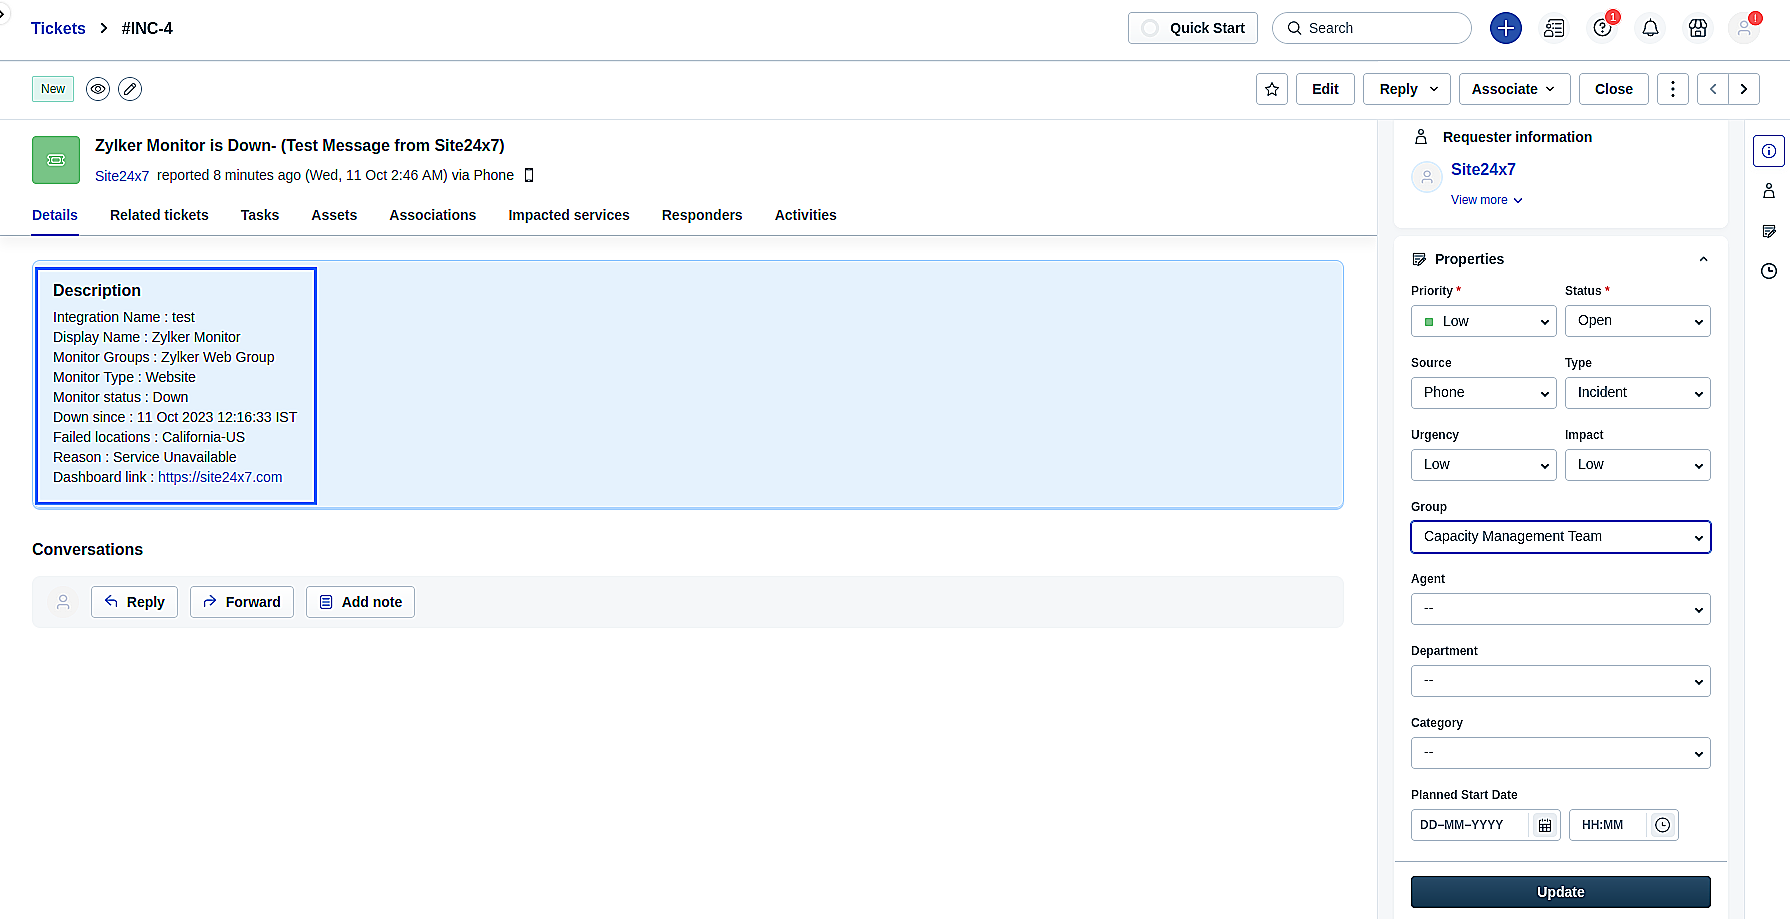
Fig 3. Description in Freshservice.
Your custom description in Site24x7 should look like the image given below.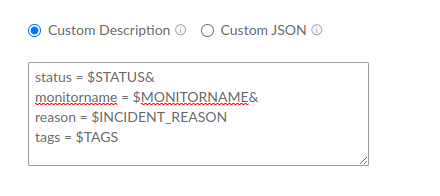
Fig 4. Custom description in Site24x7.
Custom JSON: Similarly, you can utilize the Custom JSON section to customize various properties of your ticket, including priority, urgency, impact, and more.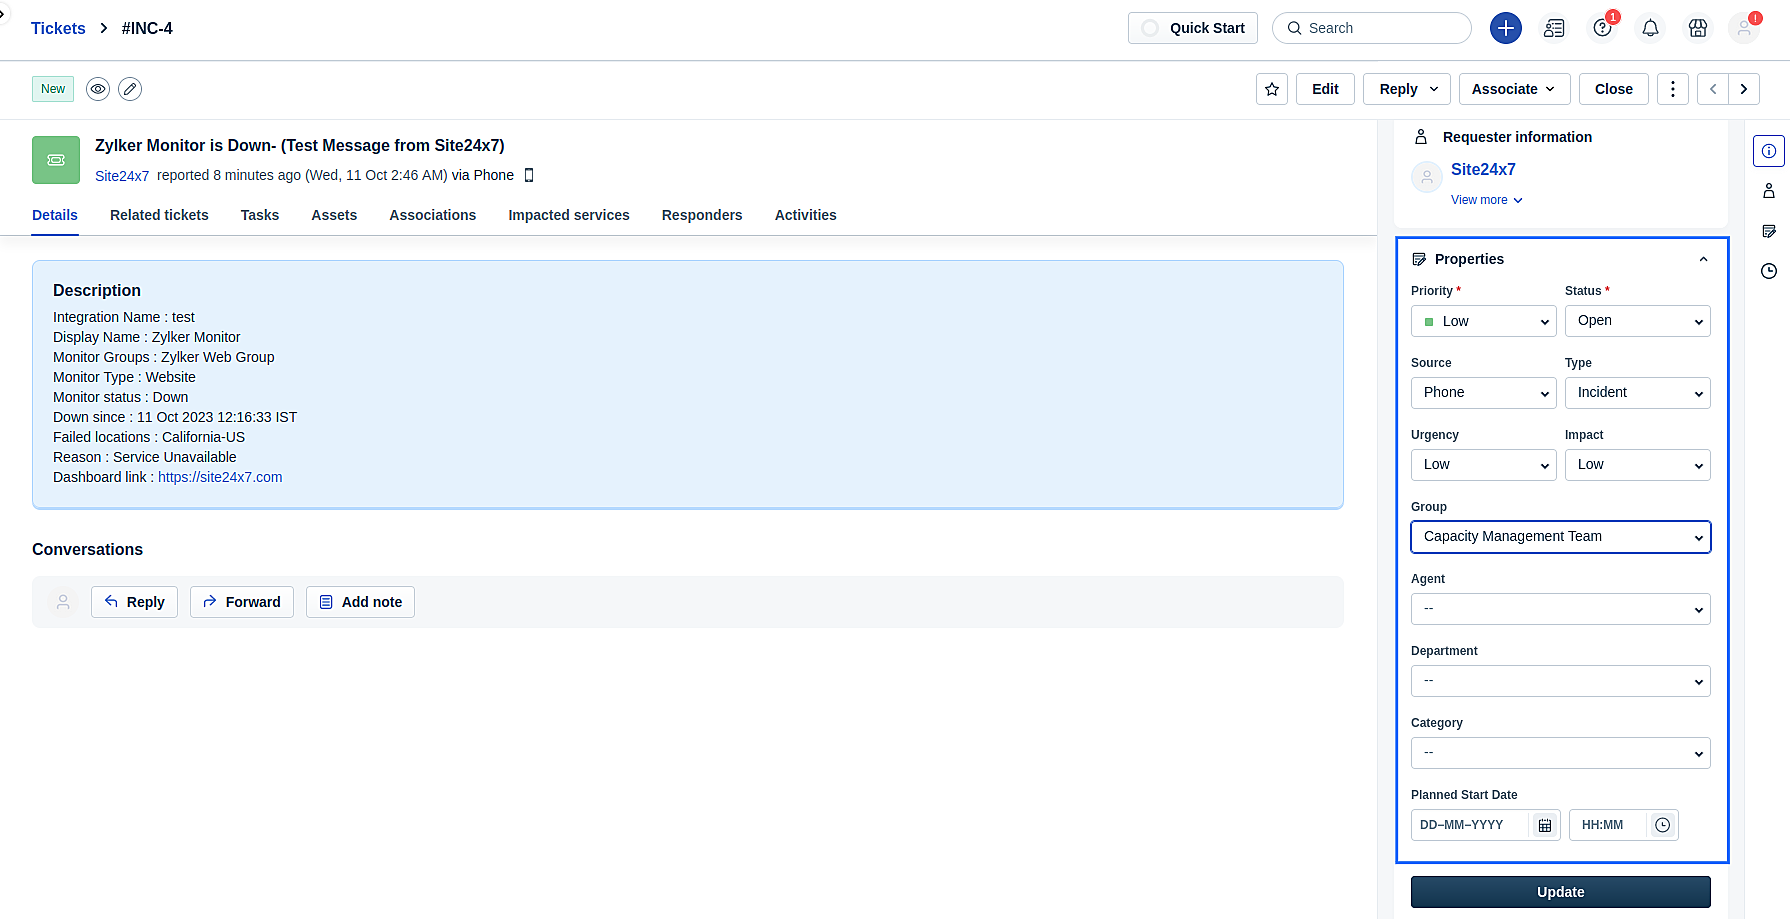
Fig 5. Properties in Freshservice.
For the relevant JSON format, refer to this help documentation. Your custom JSON configuration in Site24x7 should look like the image given below.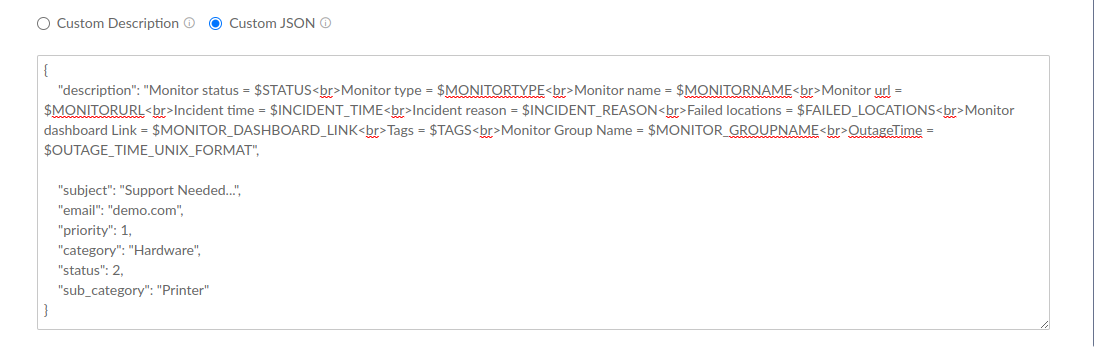
Fig 6. Custom JSON in Site24x7. - Manually Close Incidents When My Monitor Changes to Up: Use the radio button to decide whether to close incidents manually or automatically in Freshservice when the Site24x7 monitor alert changes to Up. By default, the incidents are resolved automatically in Freshservice.
- Select Integration Level: You can post status alerts and RCA links to Freshservice from specific monitors, monitors associated with selected tags, or all monitors in your account. This field is set to All Monitors by default for true global integration for which all alarms from your Site24x7 account are pushed to Freshservice.
- Tags to Be Sent with Alerts: Select the tag keys associated with the monitor that need to be sent with the alert. When an alert is triggered, tags that match the monitor will be included in the alert notification. If no tags are selected, all the tags associated with the monitor will be present in the alert notification.
- Alternate Notification Medium: If the primary third-party notification medium for sending alerts encounters an issue, an alternative notification medium will be activated to ensure that alerts are not missed.
- Click Save and Test to save the integration and to receive a test alert. Or you can just click Save to finish the integration.
Note: Please uncheck the 'Required when submitting the form' and 'Required when closing the ticket' in the ticket fields. You can navigate to the ticket field from Admin > Field Manager > Form Fields > Ticket Fields.