Install the Site24x7 PHP Agent in an Azure Web App
Follow these steps to install and configure the Site24x7 APM Insight PHP Agent in an Azure Web App.
Step 1: Create a deployment script
- Navigate to the directory /home/site24x7/ (create it if it doesn’t exist).
- Create a new shell script named apm-phpagent-deploy.sh in this location.
- Add the following contents to the script:
#!/bin/sh

apt update && apt install -y wget unzip procps

export S247_LICENSE_KEY=YourLicensekey
export ZPA_APPLICATION_NAME=YourApplicationName

wget -O InstallDataExporter.sh https://staticdownloads.site24x7.com/apminsight/S247DataExporter/linux/InstallDataExporter.sh
sh InstallDataExporter.sh

wget -O InstallAgentPHP.sh https://staticdownloads.site24x7.com/apminsight/agents/AgentPHP/linux/InstallAgentPHP.sh
sh InstallAgentPHP.sh
Note- Replace YourLicenseKey with your Site24x7 license key.
- Replace YourApplicationName with your application name in Site24x7.
Step 2: Modify the Startup command
- Open the Azure Portal.
- Navigate to your Web App.
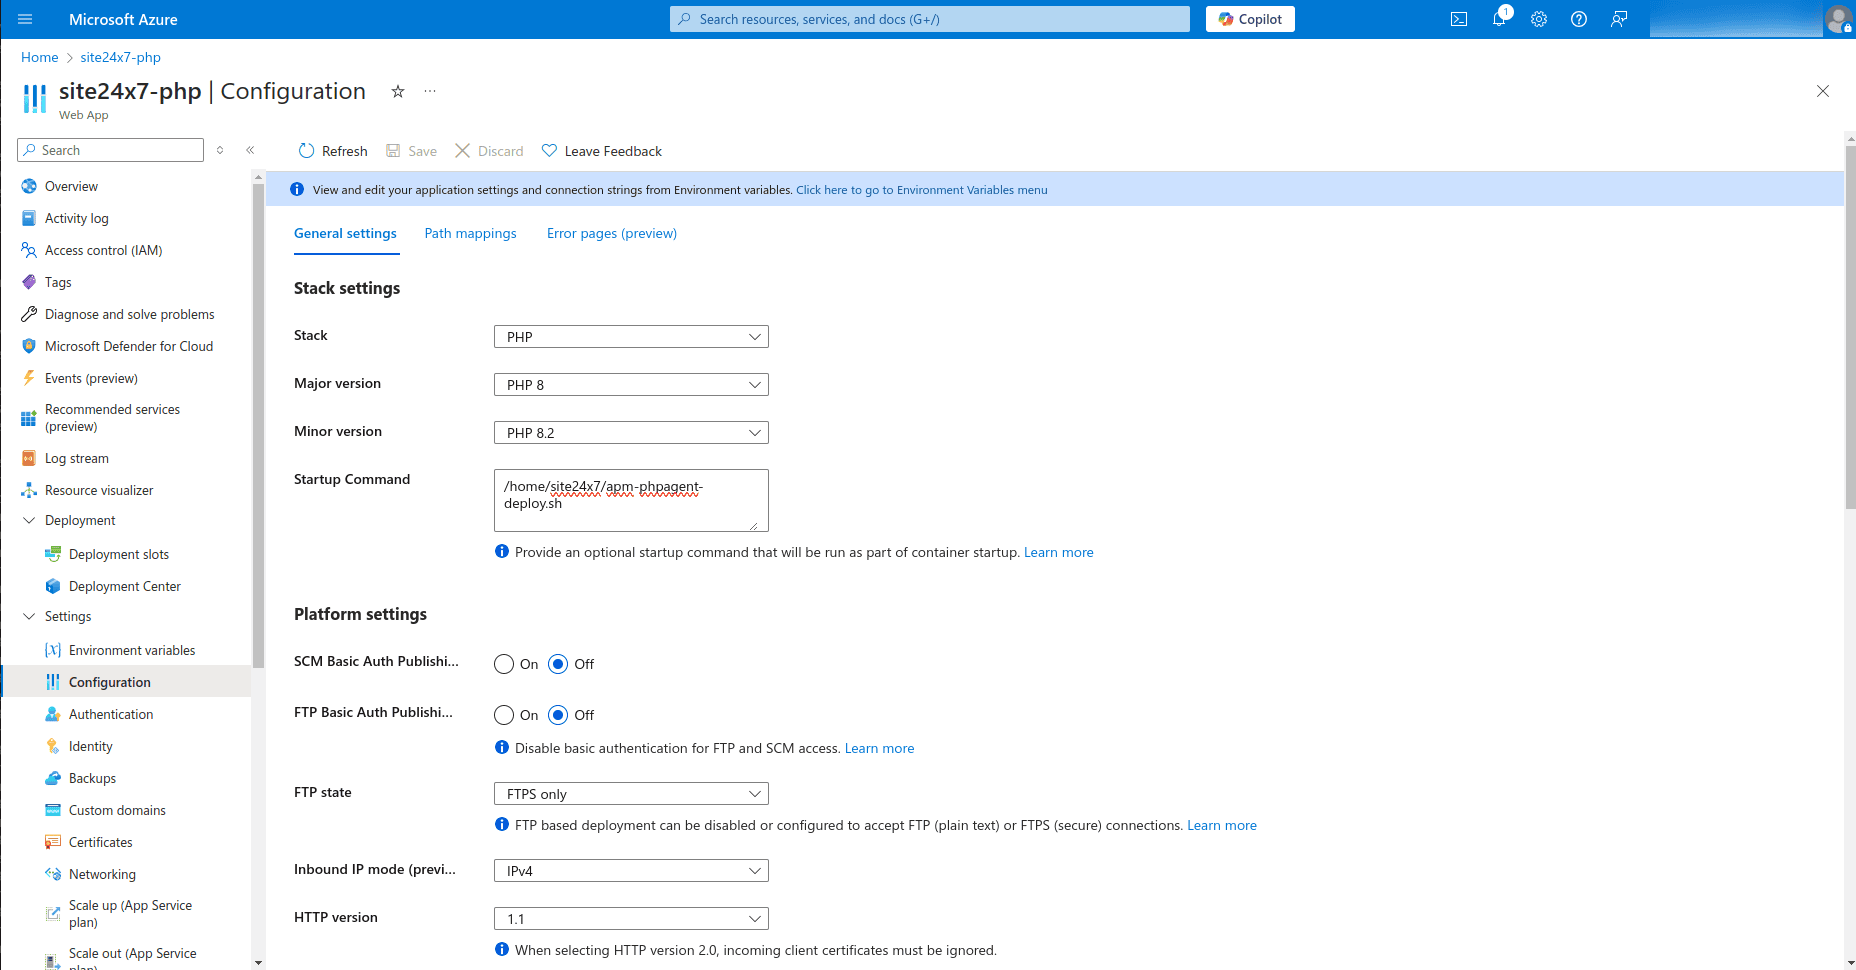
- Go to Settings > Configuration.
- Under the General Settings tab, locate the Startup Command field.
- Enter the following command:
/home/site24x7/apm-phpagent-deploy.sh

- Click Save.
Step 3: Restart the Web App
After updating the startup command:
- In the Azure Portal, navigate to your Web App.
- Click Restart.
Next step:
Go to your Site24x7 APM Insight dashboard and check if the application appears.
