Advanced Configurations for your AWS Integration
Configure default threshold profiles, automatically create monitor groups using native AWS tags, customize the AWS guidance report, suppress alerts for informational events, get notified when you run out of basic monitor units and more.
How to get started?
- Sign in to the Site24x7 web console. Choose AWS from the left side pane of the console. Click on the Integrate AWS Account option.
- Choose the AWS Account Type (Global, GovCloud (US), China) and the mode of authentication (IAM role or Access Key)
- In the Discovery Options section, select the AWS services you want to monitor.
- Choose the Advanced Configurations option, under the Services to be discovered field to open a new modal popup as given below.
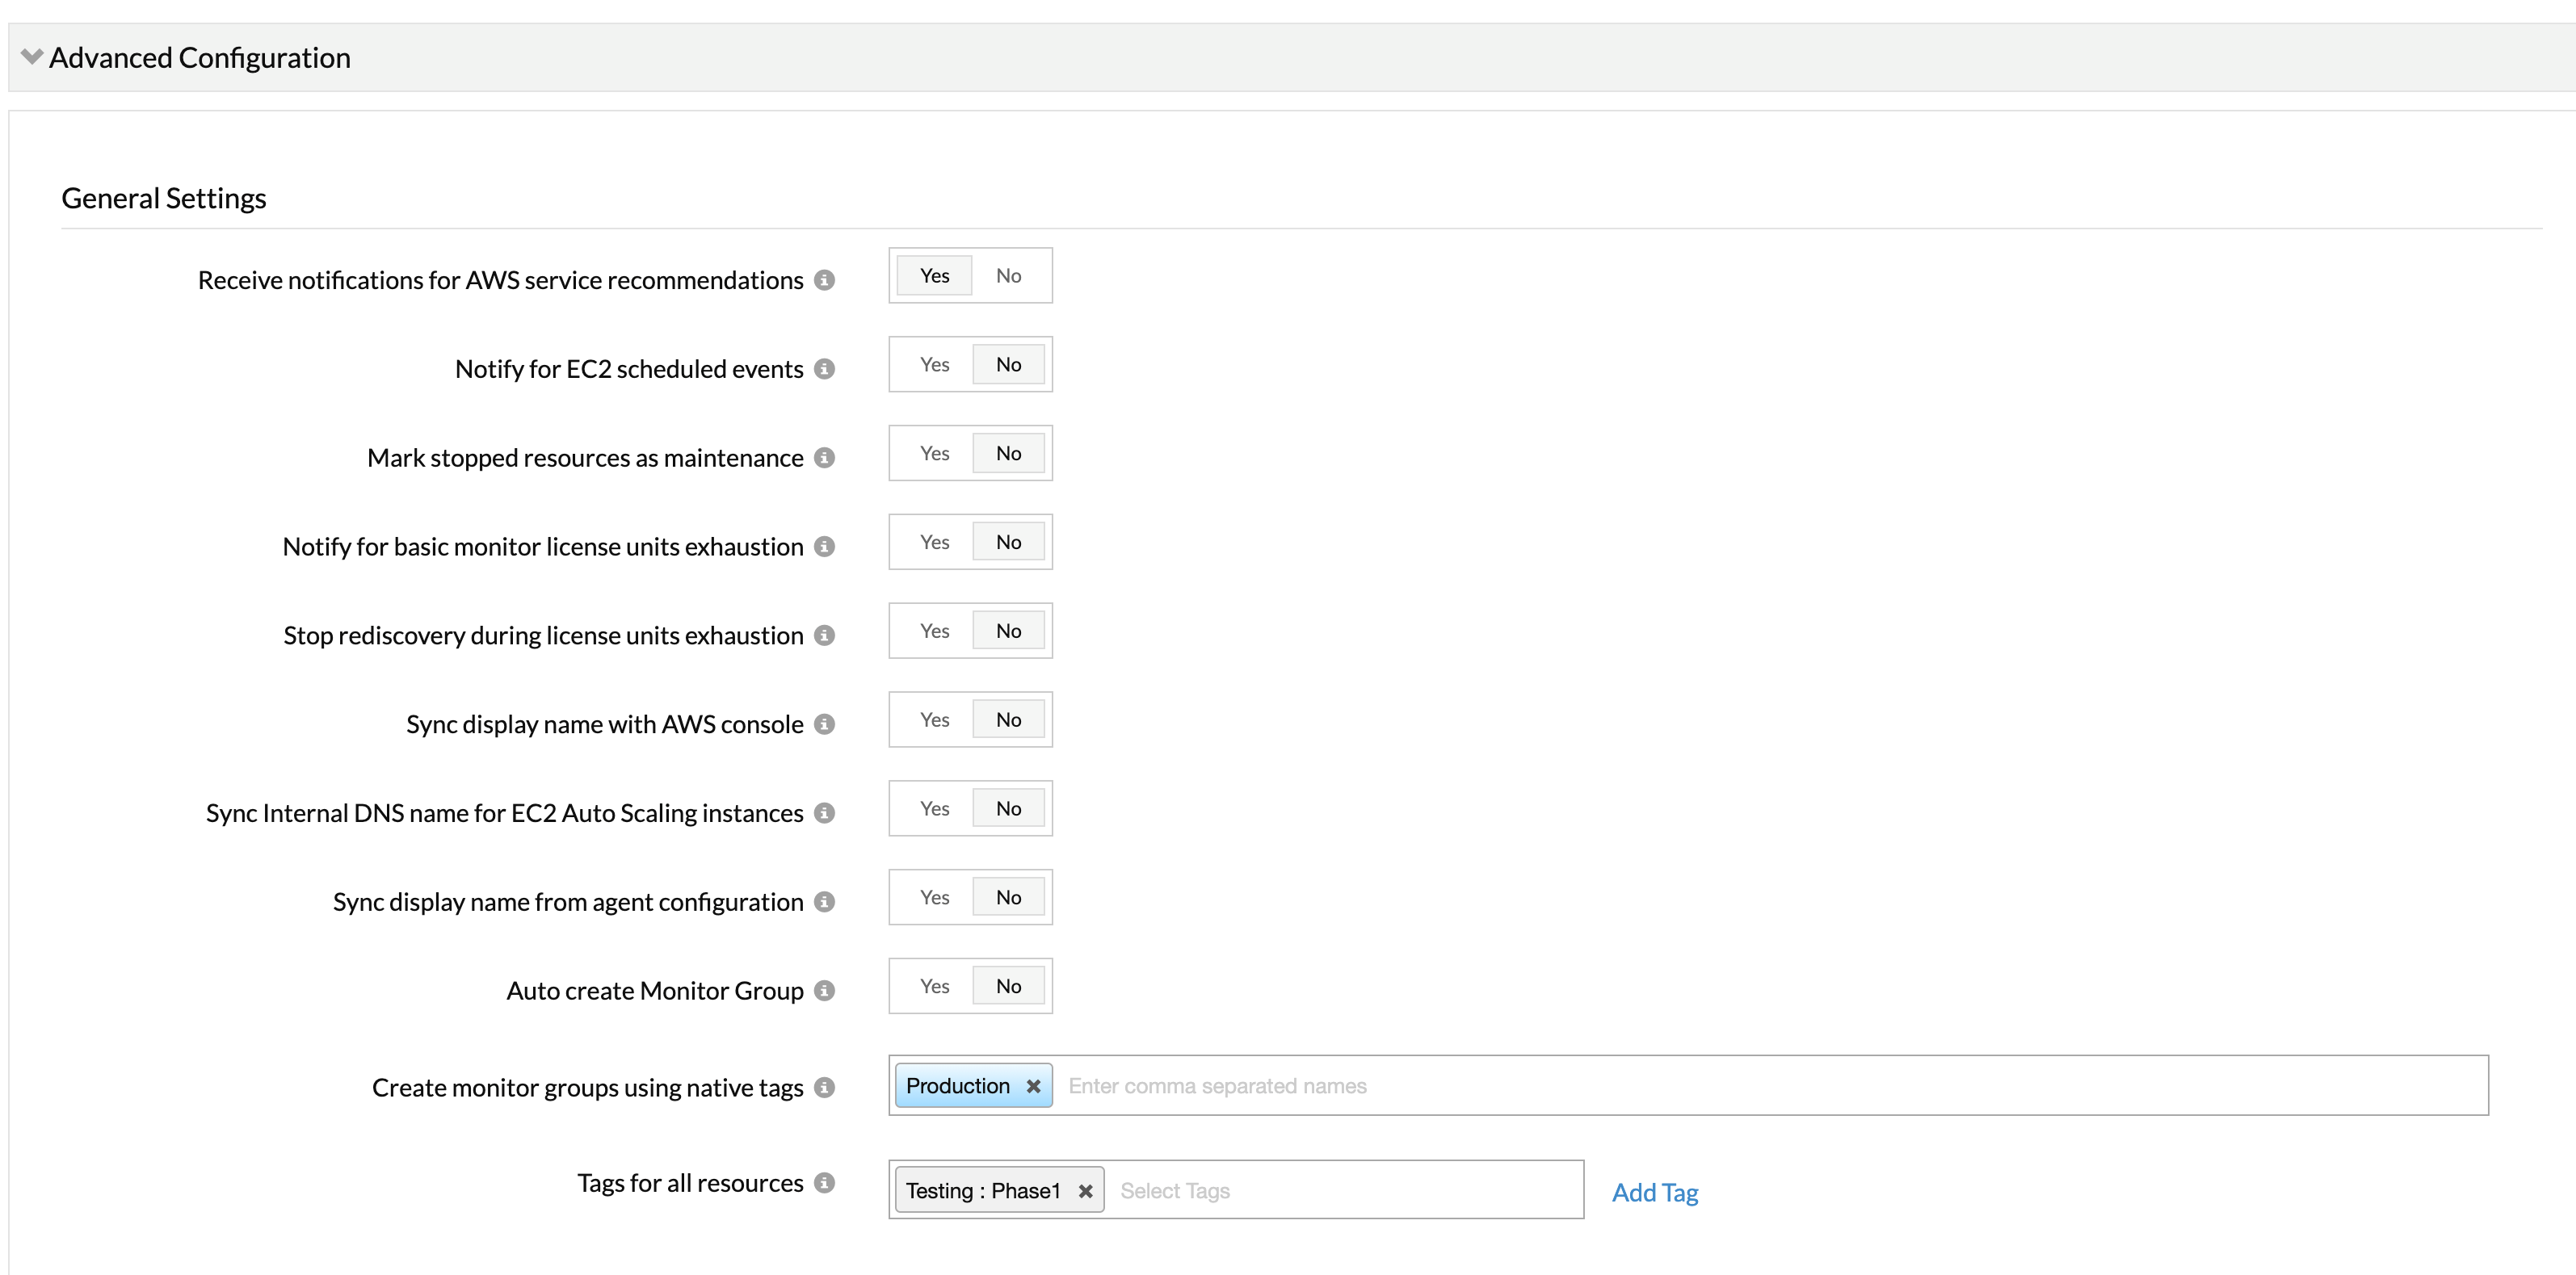
Supported Configuration options
- Sync internal DNS name for EC2 Auto Scaling Instance: When this option is toggled ON, EC2 Auto Scaling Instances will have the same display name as that of its internal DNS address.
- Sync display name: The display name can be made same as that of the name tag of the specific resource when this option is toggled ON. By defult, this toggle switch will be ON. If your instance is integrated with the server agent, the server agent name will also be changed to name tag.
- Receive Notifications for AWS Service Recommendations: Toggle Yes to receive weekly email recommendations on the other AWS services you can monitor.
NoteThis may raise multiple API requests to retrieve data sets about unmonitored services.
- Notify for EC2 scheduled events: Amazon Web Services (AWS) performs updates on the host computers powering your EC2 instances by scheduling events like reboot, stop/start, or retirement. By selecting the toggle to Yes, you can receive an email notification whenever a monitored EC2 instance is affected by a scheduled event.
NoteSite24x7 sends the email to the email address associated with the Site24x7 super admin contact.
- Mark stopped resources as maintenance: You can choose to put a stopped or disabled AWS resource into Site24x7's maintenance window by toggling to Yes. We will remove the resource from maintenance once it transitions from stopped (or) disabled to the active state.
NoteBy default, when an AWS resource moves to the stopped or disabled state, the status of the corresponding monitor in the Site24x7 console will move to Down, triggering an email alert. By selecting the toggle to yes, you not only change the status to under maintenance but also suppress the alert.
- Notify for basic monitor license units exhaustion: In Site24x7 a monitored instance of an AWS cloud service is considered a basic monitor (Example: EC2 instance, SQS queue, SNS topic, CloudFront distribution, DynamoDB table and so on). By selecting the toggle to Yes, you'll receive an email notification whenever basic monitor units of your Site24x7 subscription plan gets exhausted.
NoteSite24x7 sends the email to the email address associated with the Site24x7 super admin contact. If you've enabled the stop rediscovery option, no email notification would be sent.
- Stop rediscovery during basic monitor license units exhaustion: Rediscovery helps Site24x7 monitor newly provisioned instances of any supported AWS cloud service. By selecting the toggle to Yes you can stop rediscovery whenever basic monitor license limit occurs for your Site24x7 subscription.
- Sync server agent name for integrated monitors: Toggle to Yes, to synchronize the server agent name for all the server integrated monitors. By default, this toggle will be No. The name synchronization occurs during the integration process only and not during each service discovery or data collection. For integration supported monitors, if both 'Sync display name with AWS console' and 'Sync server agent name for integrated monitors' are toggled to Yes, the latter will be given priority.
- Auto create Monitor Group: When toggled to Yes, a monitor group is automatically created for your account and associated AWS resources to support a business view. When toggled to No, any existing monitor group created through this option will be removed in the next poll.
- Enable Service Quotas: When toggled Yes, you can view and manage service quotas for the supported AWS services directly from Site24x7.
- Select Service Quotas Profile: Select a Service Quotas Metric Profile for which you'd wish to view the reports.
- Alert for AWS Outages: Toggle to Yes if you want to receive an alert when there is an outage at AWS' end. You can configure to receive alerts after verifying a predefined number of polls.
- Generate Alert after: Choose after how many polls you should receive an alert when an AWS outage has been detected. The default poll value is three. The alerts will be generated only after three consecutive polls.
- Enable CloudWatch Agent into EC2 Server: Toggle Yes to view and manage Amazon EC2 internal metrics from Amazon EC2 CloudWatch agent in Site24x7.
- Tags: The tags assigned will be applicable for all the resources in the account.
- Notify for AWS Health Events: Toggle to Yes to recieve email notifications from Site24x7 to the AWS users in case of any AWS Health Event. If the Alert for AWS Outages and Notify for AWS Health Events options are toggled to YES at the same time, then the an outage alert is send to the user based on the health event.
- Enable RDS Performance Insights: Performance Insights monitor is an advanced monitor. When this option is enabled, Site24x7 automatically creates a Performance Insights monitor, if you have Performance Insights configured in AWS for the RDS instance. When you set this option to No, Performance Insights configured for all RDS instances will be suspended for the applicable AWS account, and Site24x7 will disable Performance Insights monitoring.
- Create monitor groups using native AWS tags: Amazon Web Services (AWS) allows you to assign metadata in the form of tags (key-value pairs) to help effectively manage resources. Now you can leverage these same tags to automatically to create logical groups of resources (Monitor Groups) in the Site24x7 console.
Example:
If you've assigned two different tags with the same keys; role=webserver and role=database, for two different AutoScaling groups, you can type in the key role in the UI field to group the various EC2 instances into two distinct monitor groups.

If you've assigned two different tags; cluster = web and environment = production, for two different AutoScaling groups, type in the keys cluster and environment as comma separated names in the UI field to group the various EC2 instances into monitor groups.

- Tags for all resources: Associate tags to all your AWS resources in the account. These tags won't apply to the Amazon monitor.
- Assign different polling intervals for different AWS services: During monitor discovery, you can assign different polling intervals ranging from as low as a minute, to different AWS services. This can be done based on Tags, Monitor Groups or Monitor Types. Click here to learn more about this.
Resource Termination Settings
Mute resource termination alerts:
- You can choose to suppress termination alerts for your monitored AWS resources by selecting the toggle to Yes.When an EC2 instance or any AWS resource terminates, the status of the corresponding monitor in the Site24x7 console will move from Up to Down triggering an alert. By choosing Yes you can change the default behavior and suppress the alert.
- The resource termination alerts can be applied on multiple AWS resources by specifying the key-value pair(s) and muting the termination alerts for them. Termination alerts for all monitored resources will be muted by default if no tags are configured.
Automatically remove terminated resources:
- When you click Yes, an additional field is provided to determine how long the terminated AWS resource must be retained in the web console of Site24x7 until permanent deletion.
- When you click No, the terminated resources will be removed in the daily clean up activity of your resources, and the terminated AWS resources will not be retained.
Remove Terminated Autoscaling Resources Instantly:
- When you toggle this option to Yes, all the terminated autoscaling resources from your account will be removed instantly. Note that all the terminated auto scaling resources will also be permanently deleted if you enable this option.
The Remove Terminated Autoscaling Resources Instantly option will be displayed only when the Automatically Remove Terminated Resources option is set to Yes.
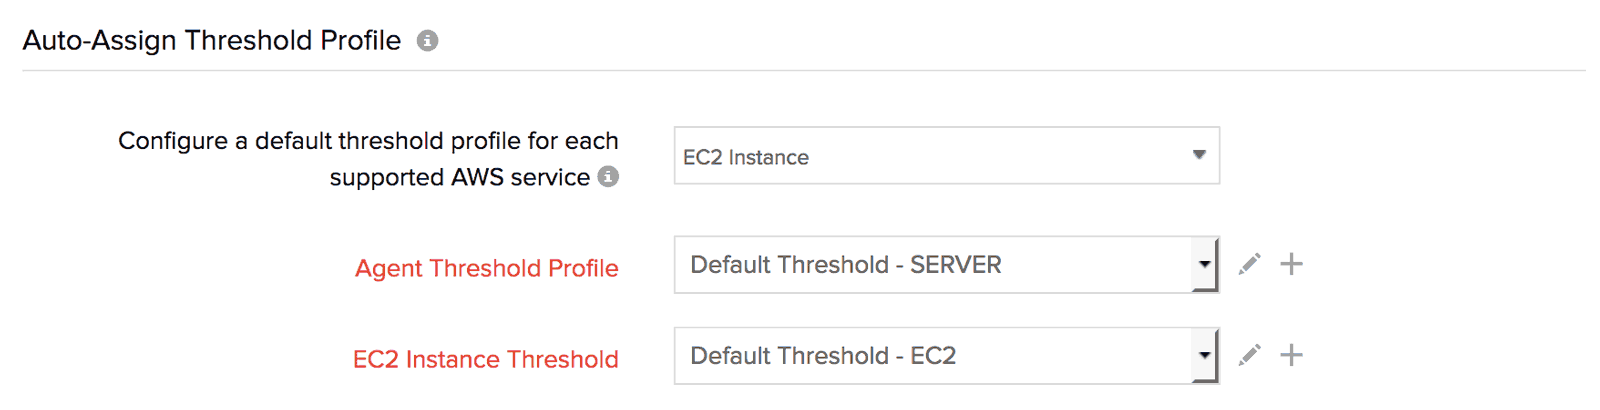
Auto-Assign Threshold Profile
Configure a default threshold profile for each supported AWS service: You can configure a default threshold profile for each supported service that gets automatically assigned to new instances of that particular service as and when it is discovered.
How can I create a default threshold profile for EC2 instance?
- Click on the Select Service drop-down and choose EC2 instance from the list.
- The page should refresh, and two new options should appear – Agent threshold profile (Contains system-level metrics. If you've already deployed the agent go ahead and configure values.) and EC2 instance profile (Contains infrastructure level metrics collected from CloudWatch) should appear.
- Click the
 (Edit icon) against the profile that needs to be edited.
 - Once the threshold profile window pops up, provide an appropriate name and start configuring alert conditions, threshold values, and alert strategies.
- Once you're done, save the profile.
Modify or edit an existing default threshold profile
You can change the selected metric, threshold values, alert strategies and the mapped automation of the default threshold profile anytime.
- Sign into the Site24x7 web console. Choose AWS and select the monitored AWS account. From the drop-down select the Inventory Dashboard, click on the
 (hamburger icon) and choose Edit.
 - In the Integrate AWS Account page, click on the Advanced Configuration option
- Scroll down to the Auto-Assign Threshold Profile section. Click on the (Edit icon) against the threshold profile that needs to be edited.
- Once the threshold profile window pops up, edit the existing attributes and update the profile by clicking Save.
- If needed, repeat the process for other supported AWS services
- Once done, click on the Save option (located in the top right corner of the screen) in the Integrate AWS Account page to successfully update the changes.
You can also choose to apply the newly modified default threshold profile to all existing monitors of the AWS service, by clicking the toggle and switching it to Yes. Alternatively, you can choose to apply the modified threshold profile to only newly discovered instances of the said cloud service by keeping the toggle as No.
Guidance Report Configuration
Enable all best practice checks and use default baselines: Site24x7's Guidance report analyzes your AWS account using our 24 best practice recommendation checks and provides insights to reduce costs and improve performance. If you want to enable all checks and use default baselines keep the toggle at Yes, if you're going to choose the recommendations and configure custom baselines (only applicable for the following checks: idle EC2 instances, underutilized EC2 instances, idle load balancers and load balancer with fewer than "n" healthy targets) select the toggle to No.
How can I create a new baseline for the Idle EC2 instances check?
- Select the toggle to No. The page should refresh and, a new section listing all the guidance report checks should appear.
- Click on the Idle EC2 instances check, configure new values for the metrics CPU usage, Network in and Network out.
- If needed, repeat the process for other applicable checks and click on Save.

Disable or edit an existing recommendation check
You can enable or disable recommendation checks and configure new baselines anytime.
Once changed, it would take one week (from the last guidance report generated time) for the report UI in the Site24x7 console to get updated with the new changes. However you can update the report UI immediately by scheduling the guidance report and sending it to an user group.
How can I disable existing recommendation checks and edit configured baselines
- Sign into the Site24x7 web console. Choose AWS and select the monitored AWS account. From the drop-down select the Inventory Dashboard, click on the (hamburger icon) and choose Edit.
- In the Integrate AWS Account page, click on the Advanced Configuration option
- Scroll down to the Guidance Report Configuration section, here you'll find the recommendation checks applicable for your AWS account.
- Edit the configured baselines or click on existing checks to disable them. Once you're done click on Save.
- Now, click on the Save option (located in the top right corner of the screen) in the Integrate AWS Account page to successfully update the changes.
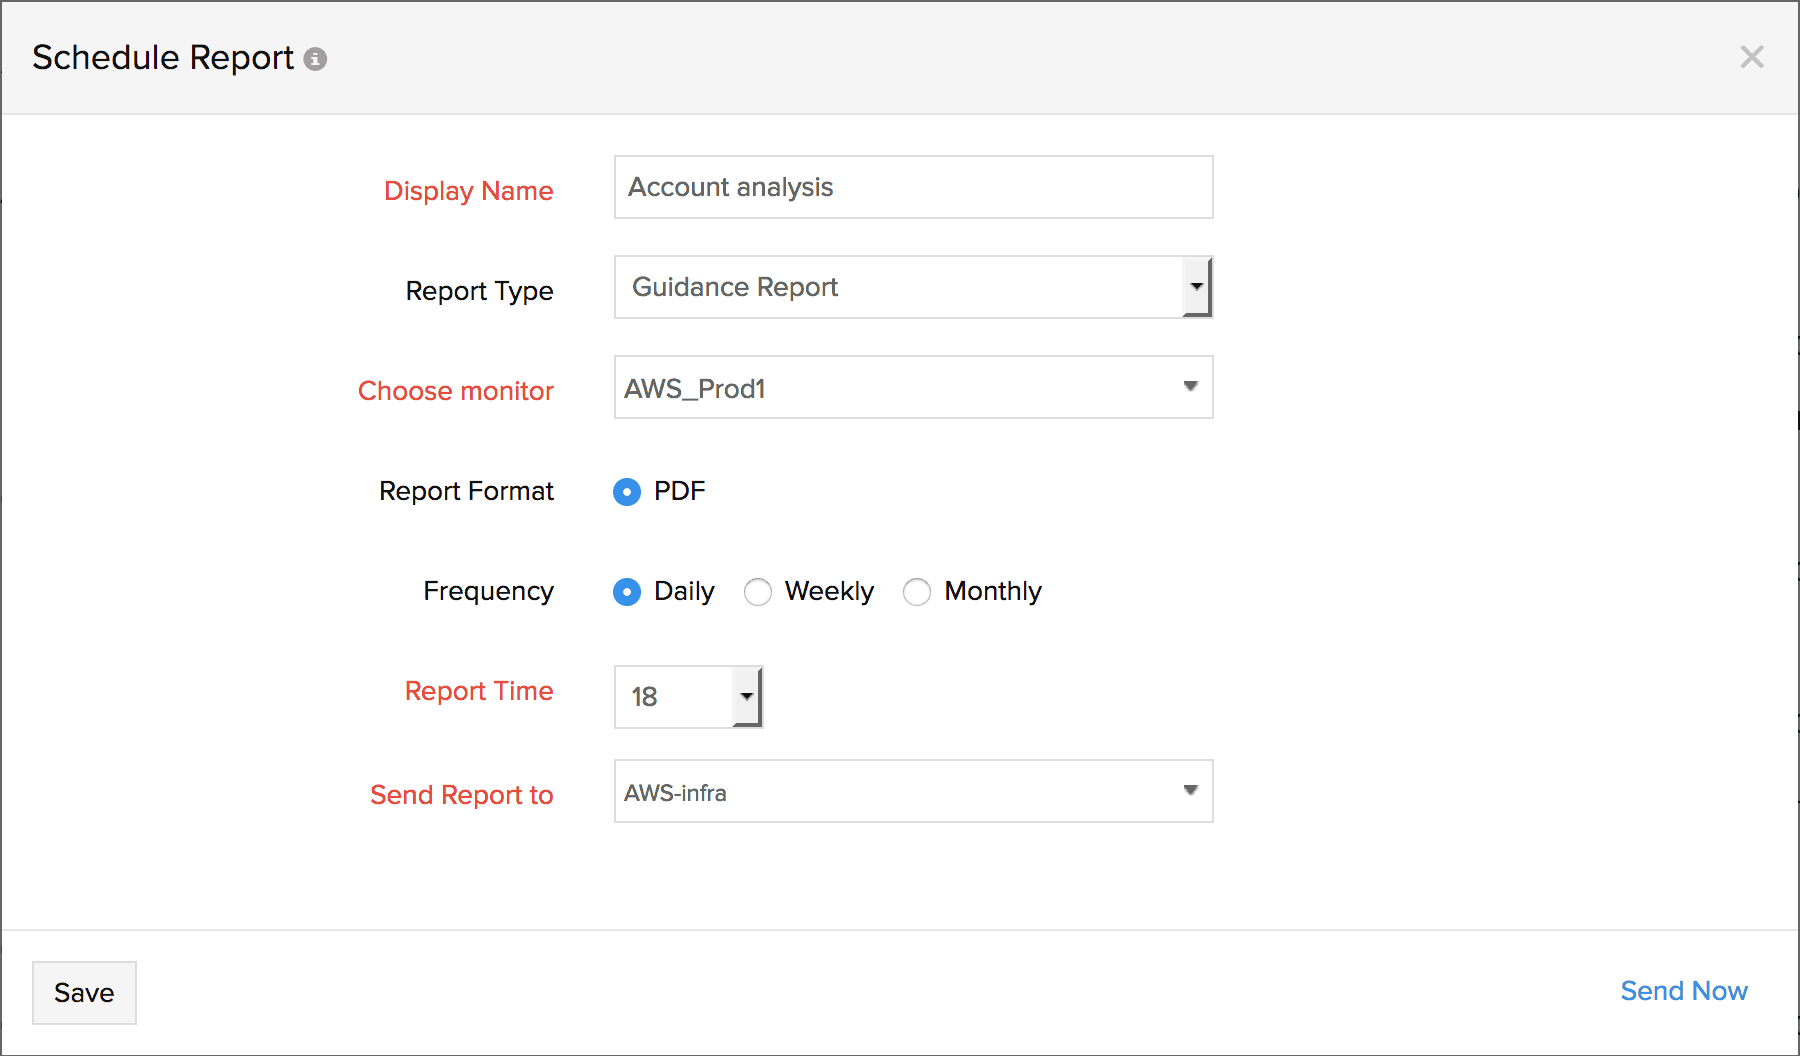
How can I schedule the guidance report?
- Sign in to the Site24x7 web console. Choose Admin and Report Settings
- Click on Schedule Report
- Type a meaningful name in the Display Name field.
- Choose Guidance Report as Report Type
- Select the monitored AWS account for which you want to schedule report, from the drop-down
- Keep format as PDF. Next, select frequency and time.
- For Send Report to option, choose an user group from the drop down
- Click on Send Now.