Configlets in Network Configuration Manager
A configlet is a configuration template that is transformed to a CLI configuration string and applied to devices. You can use variables to define dynamic elements, allowing them to act as input variables and take values based on the execution context for simplifying network automation.
Use case
Often, there is a need to make changes to the running configuration of devices, and in most cases, the same set of changes needs to be applied to multiple devices. While network administrators can manually edit the configuration, the task can be challenging due to the volume of changes and the repetitive nature of the work. Site24x7's Network Configuration Manager (NCM) provides a simple solution through configlets.
You can create a configlet according to the changes that need to be applied with the required input variables. When the configlet is ready to be run, you can provide the values and select the required devices to be executed.
Adding a configlet
- Log in to your Site24x7 account.
- Navigate to Network > NCM > Configlets.
- Click Add Configlet on the top right of the screen.
- Enter the values for the following fields:
- Display Name: Provide a unique name to identify the configlet.
- Description: Provide an appropriate description for the configlet.
- Script Execution Mode: Select an option from the drop down menu:
- Basic: To execute a single command on the CLI console.
- Advanced : To execute a sequence of commands on the CLI console based on prompt action and by adding conditions (if needed).
- Vendor: Select a device vendor to ensure that the configlet can be executed on devices provided by this vendor.
- Command: The form changes based on the Execution Mode selected in step 4.
- Basic: Only the Command field is displayed. You can add multiple commands by clicking the plus icon + next to the field. Click the x icon beside a command to delete it.
- Advanced: Add Command according to the Sequence in which it must be executed. Provide values for Prompt, Timeout, Suffix, Delay, and click the pencil icon
 beside Conditional Action to add the Condition, Value (which is a regular expression corresponding to the desired pattern), and the step to be executed on Success or Failure, which can be a step number or end of the execution. For more information, refer to the section More on Advanced Script Execution Mode.
- Click Save Configlet.
Viewing configlets
- Navigate to Network > NCM > Configlets.
- View details like Name, Execution Mode, Vendor, and Description.
- In the Action column, select:
- Pencil icon to edit a configlet.
- Trash icon
 to delete a configlet.
 - Play icon
 to execute a configlet.
- Pencil icon
Editing a configlet
- Navigate to Network > NCM > Configlets.
- Click the pencil icon beside the configlet that you wish to edit.
- Make the necessary changes, then click Save Configlet.
Deleting a configlet
- Navigate to Network > NCM > Configlets.
- Click the delete icon beside the configlet that you wish to delete.
- In the Delete Configlet pop-up, click Delete.
Executing a configlet
- Navigate to Network > NCM > Configlets.
- Click the play icon beside the configlet that you wish to execute.
- In the Execute Configlet screen, provide input values for:
- Configlet Variable Values: Toggle between Fixed for all devices and Unique value for each.
The following values will be taken from monitor details: MONITORNAME, DISPLAYNAME, GROUPNAME, STATUS, MONITORTYPE, POLLFREQUENCY, MONITORURL, DOWNREASON, DOWNTIME, INCIDENT_TIME, POLLER_IP, NETFLOW_IP, and NETFLOW_PORT. For example, if you want to replace the IP address of the On-Premise Poller from the monitor details, you can enter ${POLLER_IP} in the appropriate variable field. Additionally, predefined values can be substituted from Admin > Configuration Profiles > Global Parameters. The value can be entered as ${key}, where key is the global parameter (as given exactly) in the Site24x7 client. - Configlet Variable(s): Provide input values (if any) if you have selected Fixed for all devices in Configlet Variable Values step. Then select the Device(s) on which the configlet must be executed.
- Upload File: You can upload a CSV file with unique values for each device when selecting Unique value for each in the Configlet Variable Values step. To ensure the correct format, click Download Sample File, update the required values, and then upload the CSV by clicking Browse and selecting the file from your system.
NoteConfiglets can be executed on devices monitored by an On-Premise Poller with version 6.3.0 or higher.
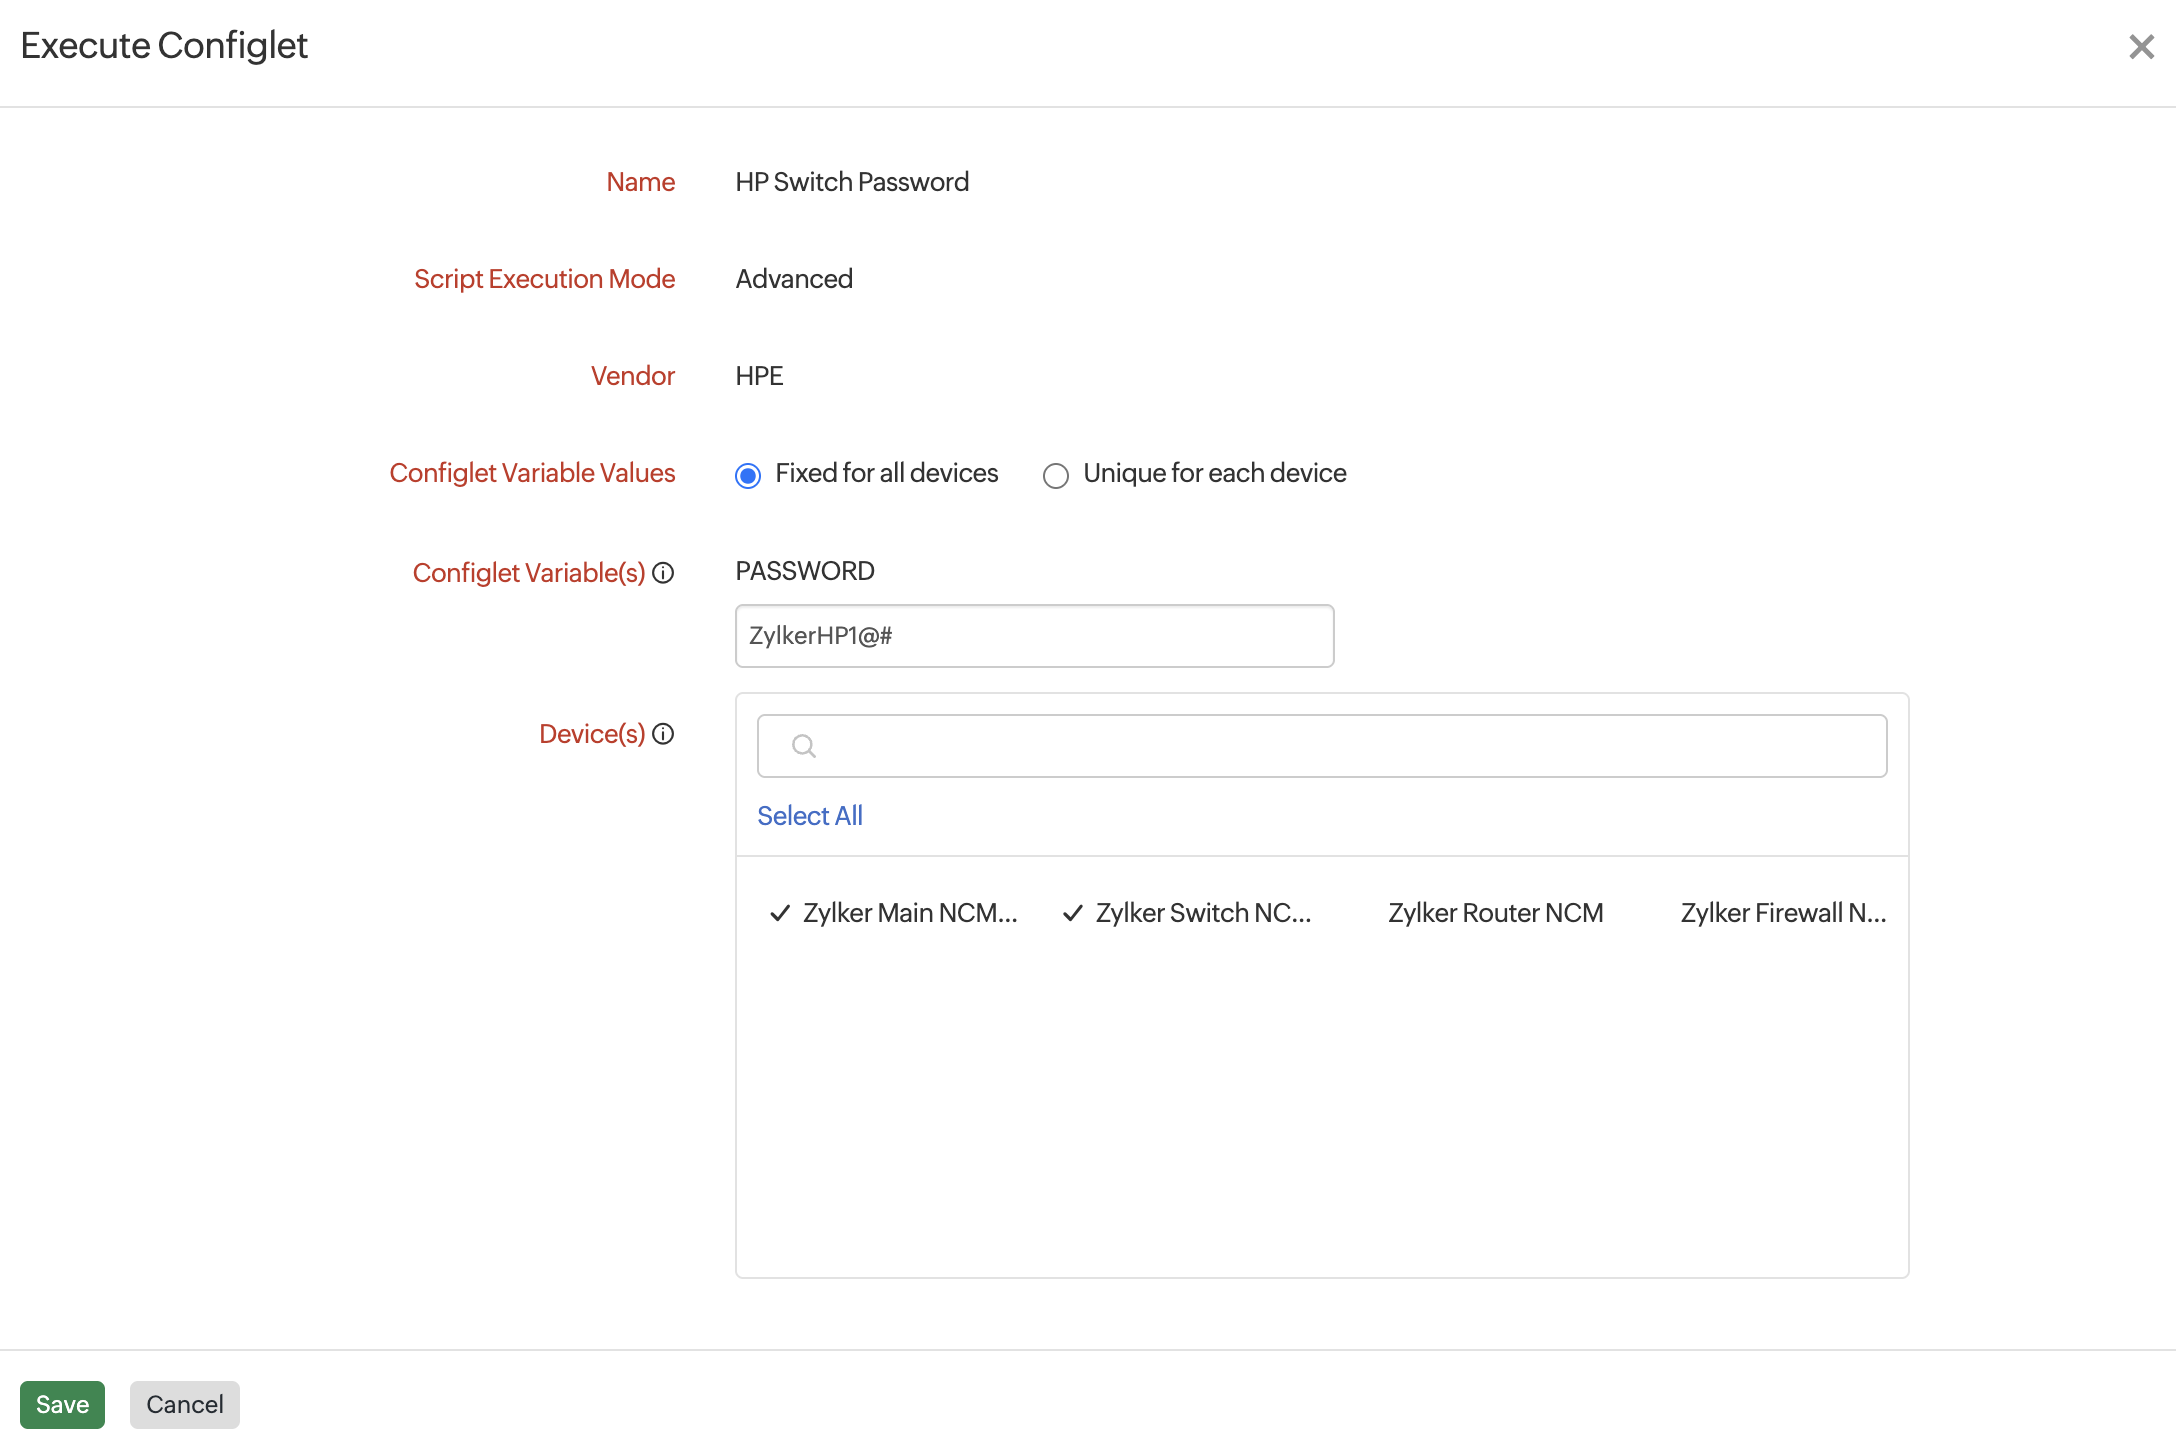
Figure 1. Executing a configlet.
- Configlet Variable Values: Toggle between Fixed for all devices and Unique value for each.
Execution History
- Navigate to Network > NCM > Configlets > Execution History.
- View details like Configlet Name, the Device Name where it was executed, Invoked Time, Invoked By, Execution Time, and Status.
More on Advanced Script Execution Mode
The Advanced Script Execution Mode allows users to execute a series of commands on a device through the command line. To do this, you must provide the commands that need to be executed in a specific format, as shown in the examples below.
| Purpose | Example 1 | Example 2 |
|---|---|---|
| Executing the first command |
show version
|
show ip route
|
| Command to be executed after a prompt |
reload
|
delete vlan 10
|
| Command to be executed after a timeout |
show interfaces
|
show spanning-tree
|
| Command with suffix to avoid pressing Enter |
yes
|
enable
|
| Command which displays a prompt after execution |
write memory
|
copy running-config startup-config
|
| Command with no expected response after execution |
clear counters
|
clear logging
|
| Command with placeholder for hostname and timestamp |
copy running-config tftp:
$TFTP_IP
$Hostname_$Timestamp_config_backup
|
backup config tftp
$Hostname_$Timestamp_config_backup
show interfaces status
|
| Command with delay before next command execution |
reload
|
write erase
|