Multiple Credential Support
Site24x7 uses SNMP to pull data from the devices and communicates with them. Network discovery is simplified with multiple credentials support as it brings down the discovery process to a single step.
Managing Network Credentials
- Log in your Site24x7 account.
- Click Network > Network Credentials.
You can add credential, edit/delete credential and test device credential from this view.
Adding a credential
Add the right credentials to your network devices and read the data at times of need.
- Click Network > Network Credentials.
- Click on the Add Credential button located at the top right corner.
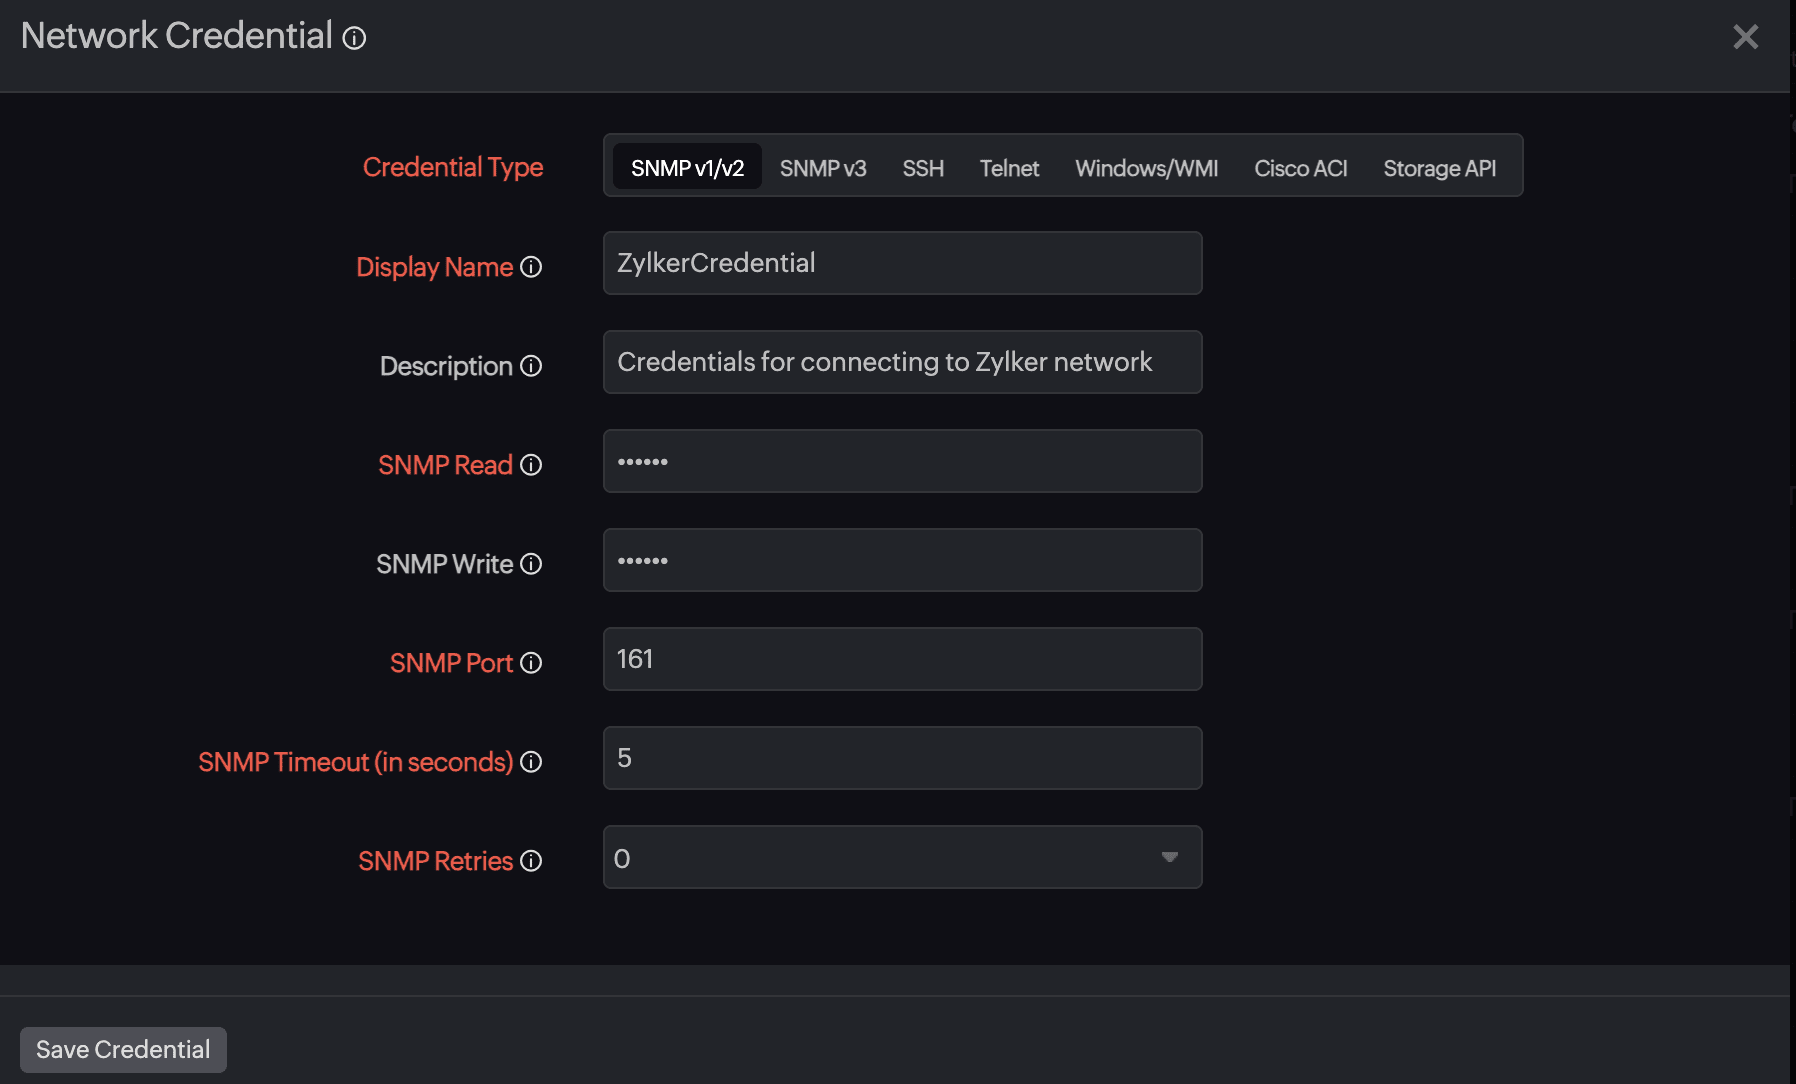
- In the add credentials screen, select the type of your credential: SNMP v1/v2, SNMP v3, SSH, Telnet, Windows/WMI, Cisco ACI, or Storage API. Enter the following corresponding to the credential type you've chosen.
SNMP v1/v2
- Display Name: Provide a name to identify the credential. Credential names cannot include a space or special characters.
- Description: Enter a short description to define and differentiate between different credentials.
- SNMP Read: Enter your SNMP read-only community string.
- SNMP Write: Enter your SNMP read-write community string.
- SNMP Port: Enter the port that should be used for SNMP communication.
- SNMP Timeout (in seconds): Specify the time Site24x7 should wait for the SNMP response.
- SNMP Retries: Choose the number of times a request should be sent when a timeout occurs.
- Click Save Credential.
SNMP v3
- Display Name: Provide a name to identify the credentials.
- Description: Provide a short description to define and differentiate between different credentials.
- Username: Enter the SNMP v3 username.
- Context Name: Enter the context name. This is an octet string that has at least one piece of management information. Within an administrative domain, contextID uniquely identifies an SNMP entity that may recognize an instance of a context with a particular context name.
- Authentication Protocol: Choose the protocol used for authentication, i.e., the protocol that checks the integrity of the transferred data. MD5 and SHA are processes that are used for generating authentication and privacy keys in SNMPv3 applications.
- Authentication Password: Enter the chosen protocol's authentication password.
- Encryption Protocol: Choose the protocol used for data encryption.
- Encryption Password: Enter the encryption protocol's password.
- SNMP Port: Enter the port that should be used for SNMP communication.
- SNMP Timeout (in seconds): Specify the time Site24x7 should wait for the SNMP response.
- SNMP Retries: Choose the number of times a request should be sent when a timeout occurs.
- Click Save Credential.
SSH/Telnet
- Display Name: Provide a name to identify the credentials.
- Description: Provide a short description to define and differentiate between different credentials.
- Username: Enter the Secure Shell or Telnet username.
- Password: Enter the SSH or Telnet password.
- Port: Enter the port number to connect to the device using SSH or Telnet.
- Timeout (in seconds): Specify the time Site24x7 should wait for the SSH or Telnet response.
- Enter the details like Prompt, Login Prompt, Password Prompt, Enable Username, Enable Password Type, Enable Password, Enable Command, and Enable Prompt.
- Toggle Additional Parameters to Yes if required and enter them as well. Enter the Login Prefix Prompt, Login Prefix, Enable Username Prompt, and Enable Password Prompt for your respective credentials.
- Click Save Credential.
Windows/WMI
- Display Name: Provide a name to identify the credentials.
- Description: Provide a short description to define and differentiate between different credentials.
- Domain Name\User Name: Enter the user name in the format DOMAIN or username. This is to specify the domain user.
- Password: Enter the appropriate password.
- Click Save Credential.
Cisco ACI
Learn how to add credentials for a Cisco ACI device.
Storage API
- Display Name: Provide a name to identify the credential.
- Description: Provide a short description to define and differentiate between different credentials.
- User Name: Enter the user name.
- Password: Enter the appropriate password.
- Port: The value is given as 443 by default. Update the value if needed.
- Timeout (in seconds): Specify the time Site24x7 should wait for a response.
- SSL Enabled: Toggle Yes if the data transmission is secured.
Editing or deleting a credential
If you want to edit or delete a credential, it is as simple as adding one.
- In the Network Credentials screen, click the edit icon
 or delete icon
  .
. - If you're editing the credential, update the specifics as given above in the Adding a credential section.
- Click Save Credential.

Testing device credentials
If a configuration error is notified, device discovery fails because of incorrect credentials, or you just want to check the correctness of your credentials, you can test them.
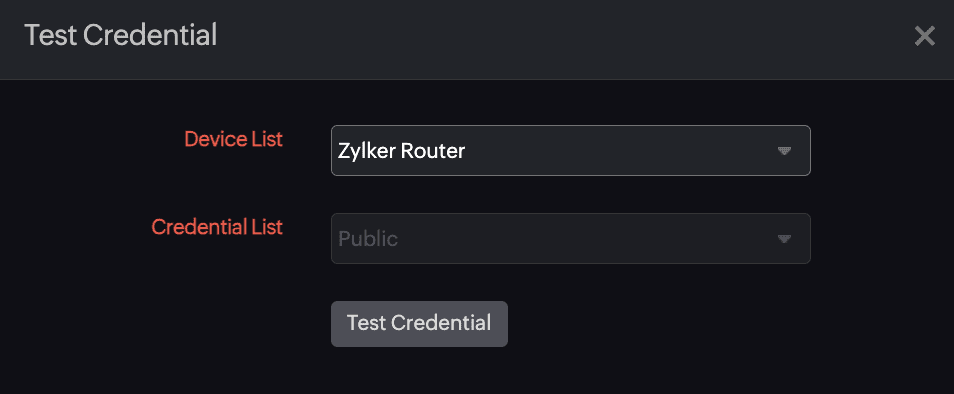
- In the Network Credential view, click Test Now against the credential you want to test.
- Use the Device List drop-down to select a device.
- Click Test Credential.
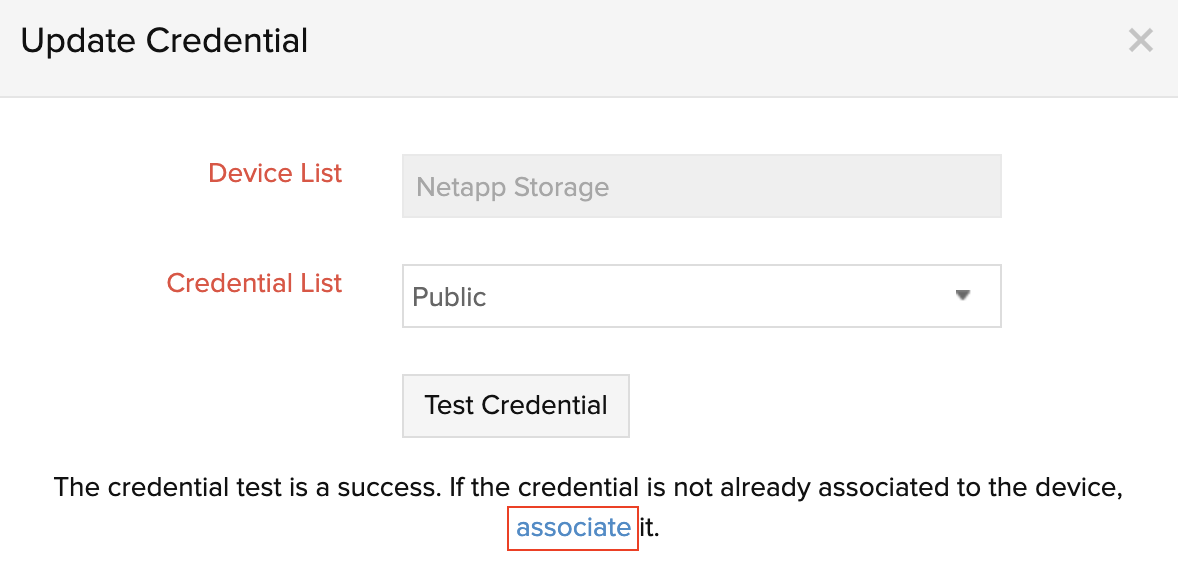
- If the test is a success, associate the credential to the device (if it is not associated already.)
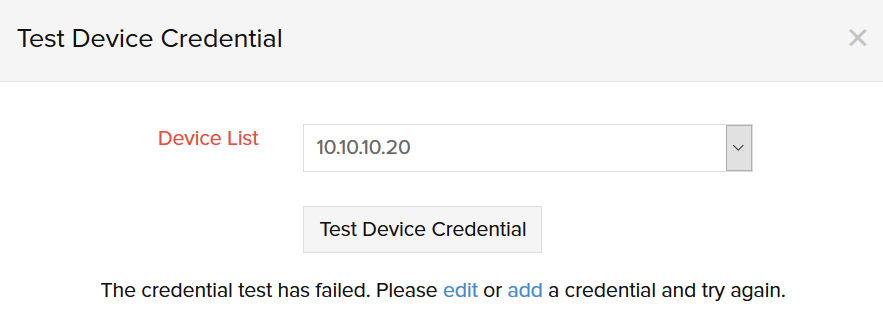
- If the test is a failure, edit the existing credential or add a new one and try again.
Bulk update device credentials
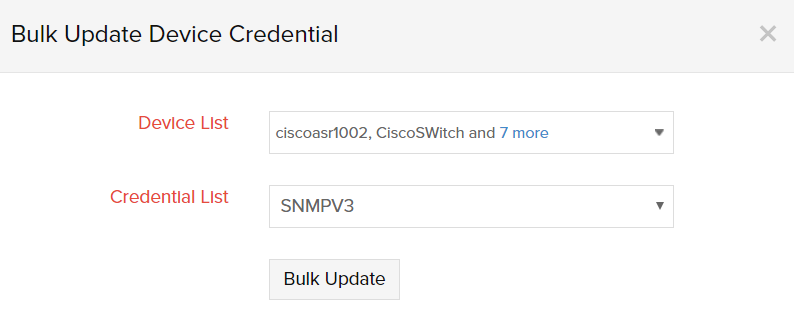
The process of updating device credentials for multiple devices individually is in real, a tedious process. Understanding this, Site24x7 has come up with an option to update device credentials for multiple devices in a single go using Bulk update device credentials option.
- Click Network > Settings > Bulk Actions > Bulk Update Credential.
- Select the Device list and Credential List from the drop drop-down menu.
- Click Bulk Update.
Sharing common credentials across devices
In general, similar devices share common credentials, and entering the same credentials separately for different devices is no easy task. Site24x7 provides the flexibility of creating common credentials and sharing them among multiple devices. When all the credentials are added during network discovery, the corresponding devices that are mapped to the credentials in that network will automatically be added for monitoring.
Adding Multiple Credentials
Multiple credential support allows the usage of any number of credentials in network discovery. Using this feature, you can use all the credentials for network discovery in one go and discover all the corresponding monitors at once. This avoids the process of rediscovering the network with every credential.
Any infrastructure can be monitored using all the credentials mentioned above and can be added at once. Simply select the desired credentials when prompted.
