APM Business Transactions
APM Key Transactions are now APM Business Transactions with enhanced capabilities and advanced configuration options.
You can add business-critical transactions as Business Transactions and track their performance separately. This helps you assess the performance metrics of important transactions at a glance instead of having to search for them in the pool of web transactions. By marking business transactions, you can set specific thresholds, receive alerts, and track performance reports for them.
Licensing: Each business transaction is considered a separate, basic monitor, and priced as a basic monitor.
Mark business transactions
- Log in to your Site24x7 account.
- Navigate to APM Insight > APM Business Transactions > Add APM Business Transaction.
- Select your Application Name from the drop-down list.
- Choose the Transactions that need to be marked as business transactions from the drop-down menu. You can also enter the transaction name in the search bar to pull up your transactions from the list quickly.
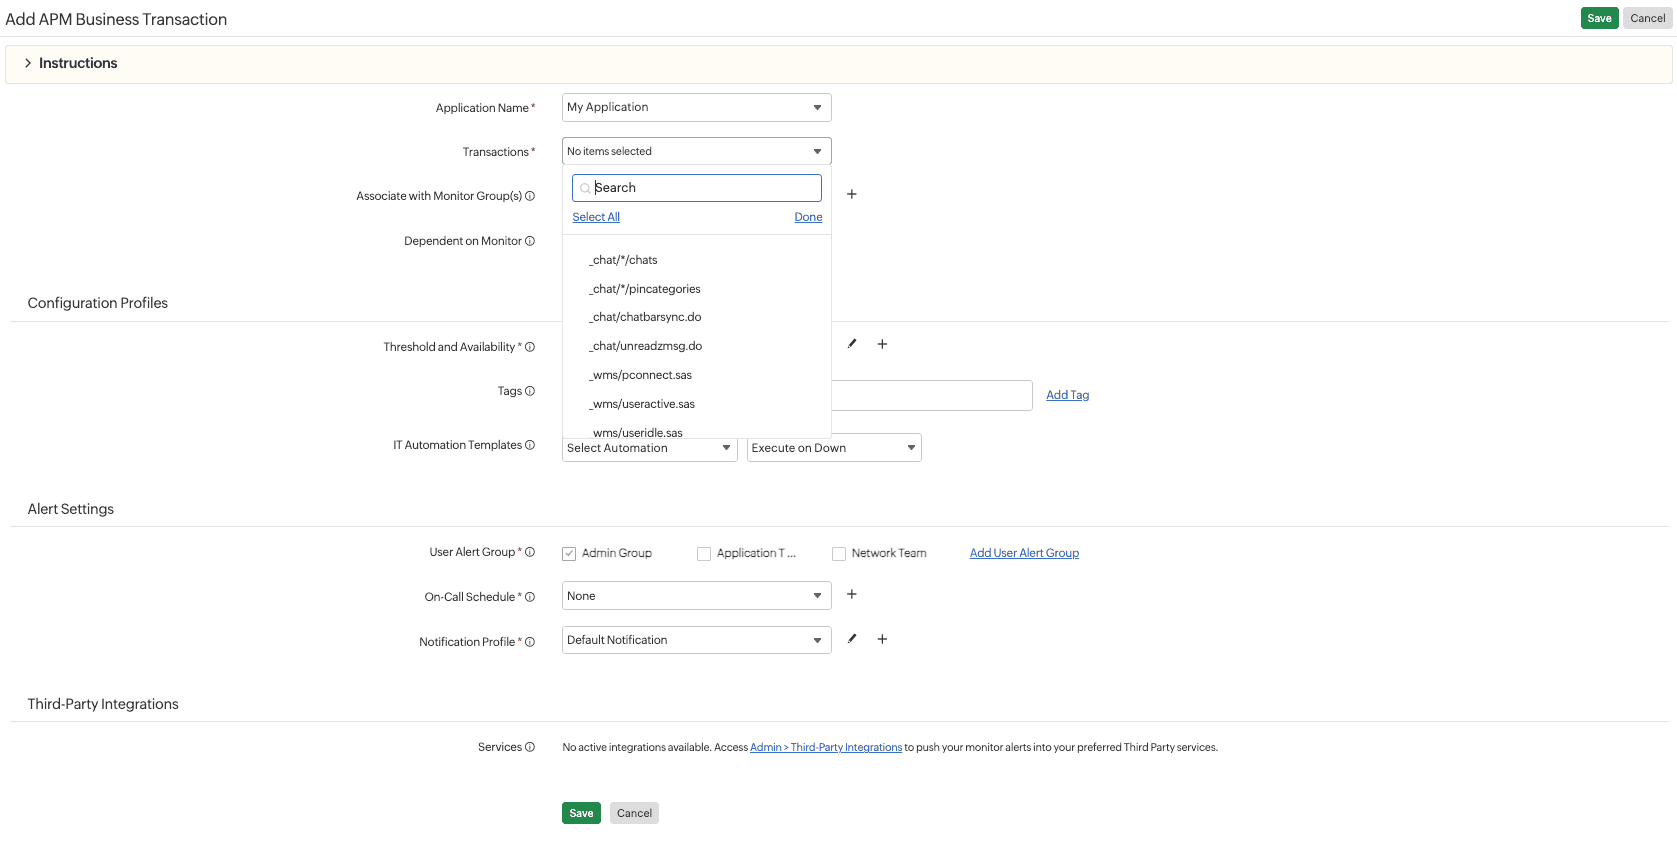
- Upon selecting the transactions, you can add or edit the Configuration Profile. When adding a new profile, the default Configuration Profile will be applied. Learn more.
- The default Threshold and Availability configuration will be applied; however, you can edit or create a new profile, which affects if you'll receive alerts when the monitor goes into trouble or critical status. Learn more.
- You can also edit or add a new Notification Profile.
- Select the User Alert Group, add Tags if necessary, and click Save.
NoteUsers with custom roles can use the View My Resources option to filter and view resources they created.
View business transactions
- Navigate to APM > APM Insight > APM Business Transactions.
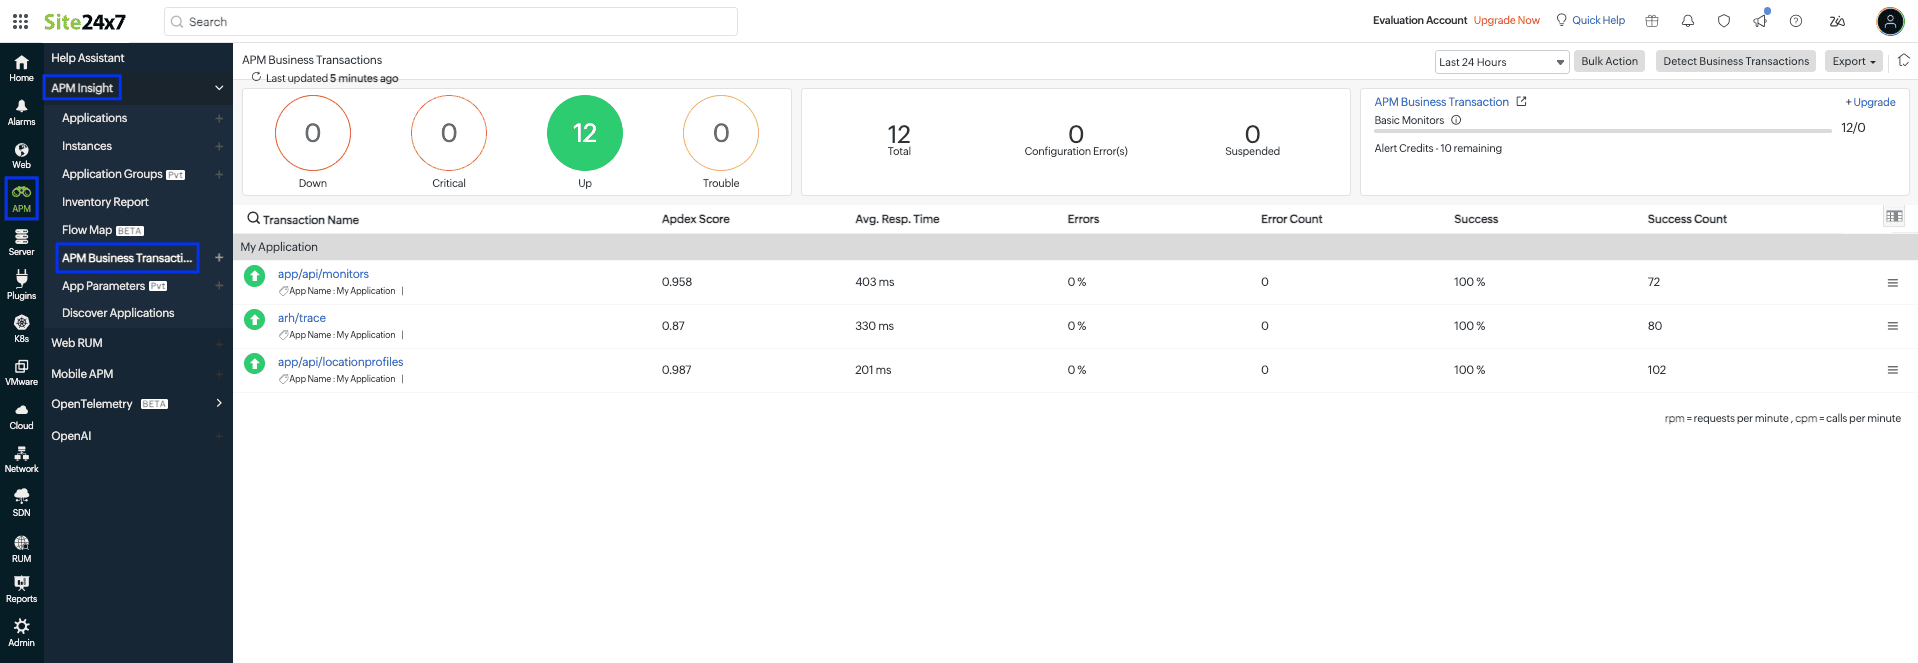
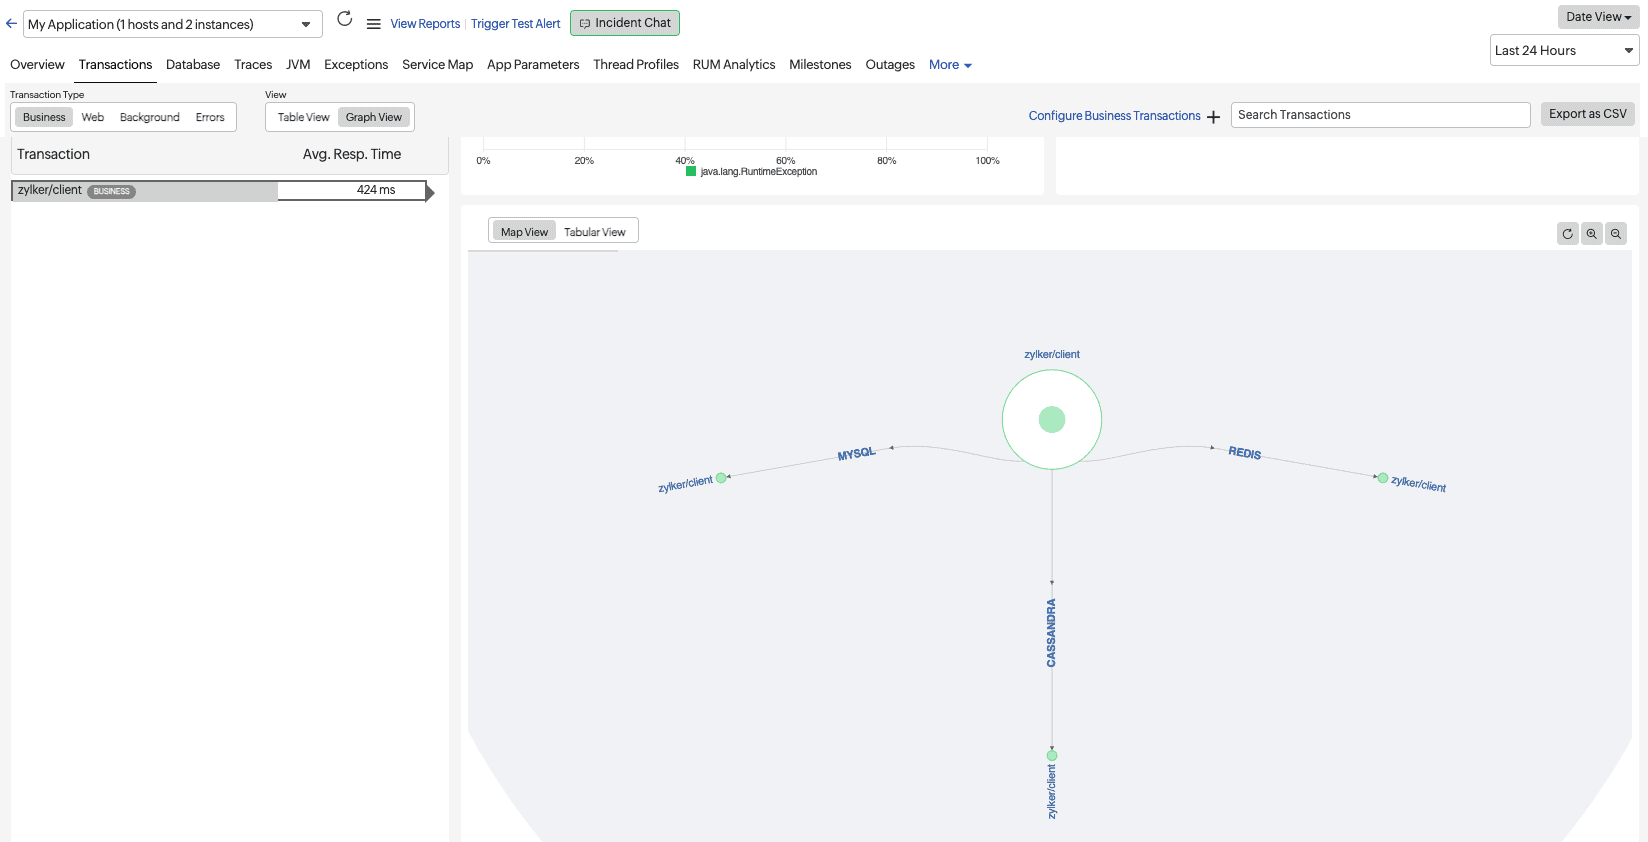
- In the list of business transactions, click the required business transaction monitor to view its details. You can scroll to the bottom of the page to view the service map.
- The metrics captured are the same for business transactions as for individual applications. However, by marking them as business transactions, you can receive alerts whenever there is a threshold breach.
- You can use the hamburger
 icon to change the business transaction's display name or even delete the transaction if you don't want the alerting for it.
Skip transactions
Alternatively, you can also skip monitoring for certain transactions. To do this:
- Navigate to APM > Your application.
- Go to the Edit APM Agent Configuration Profile screen.
- In the Skip Transactions field, add the transaction names or URL patterns you want to exclude.
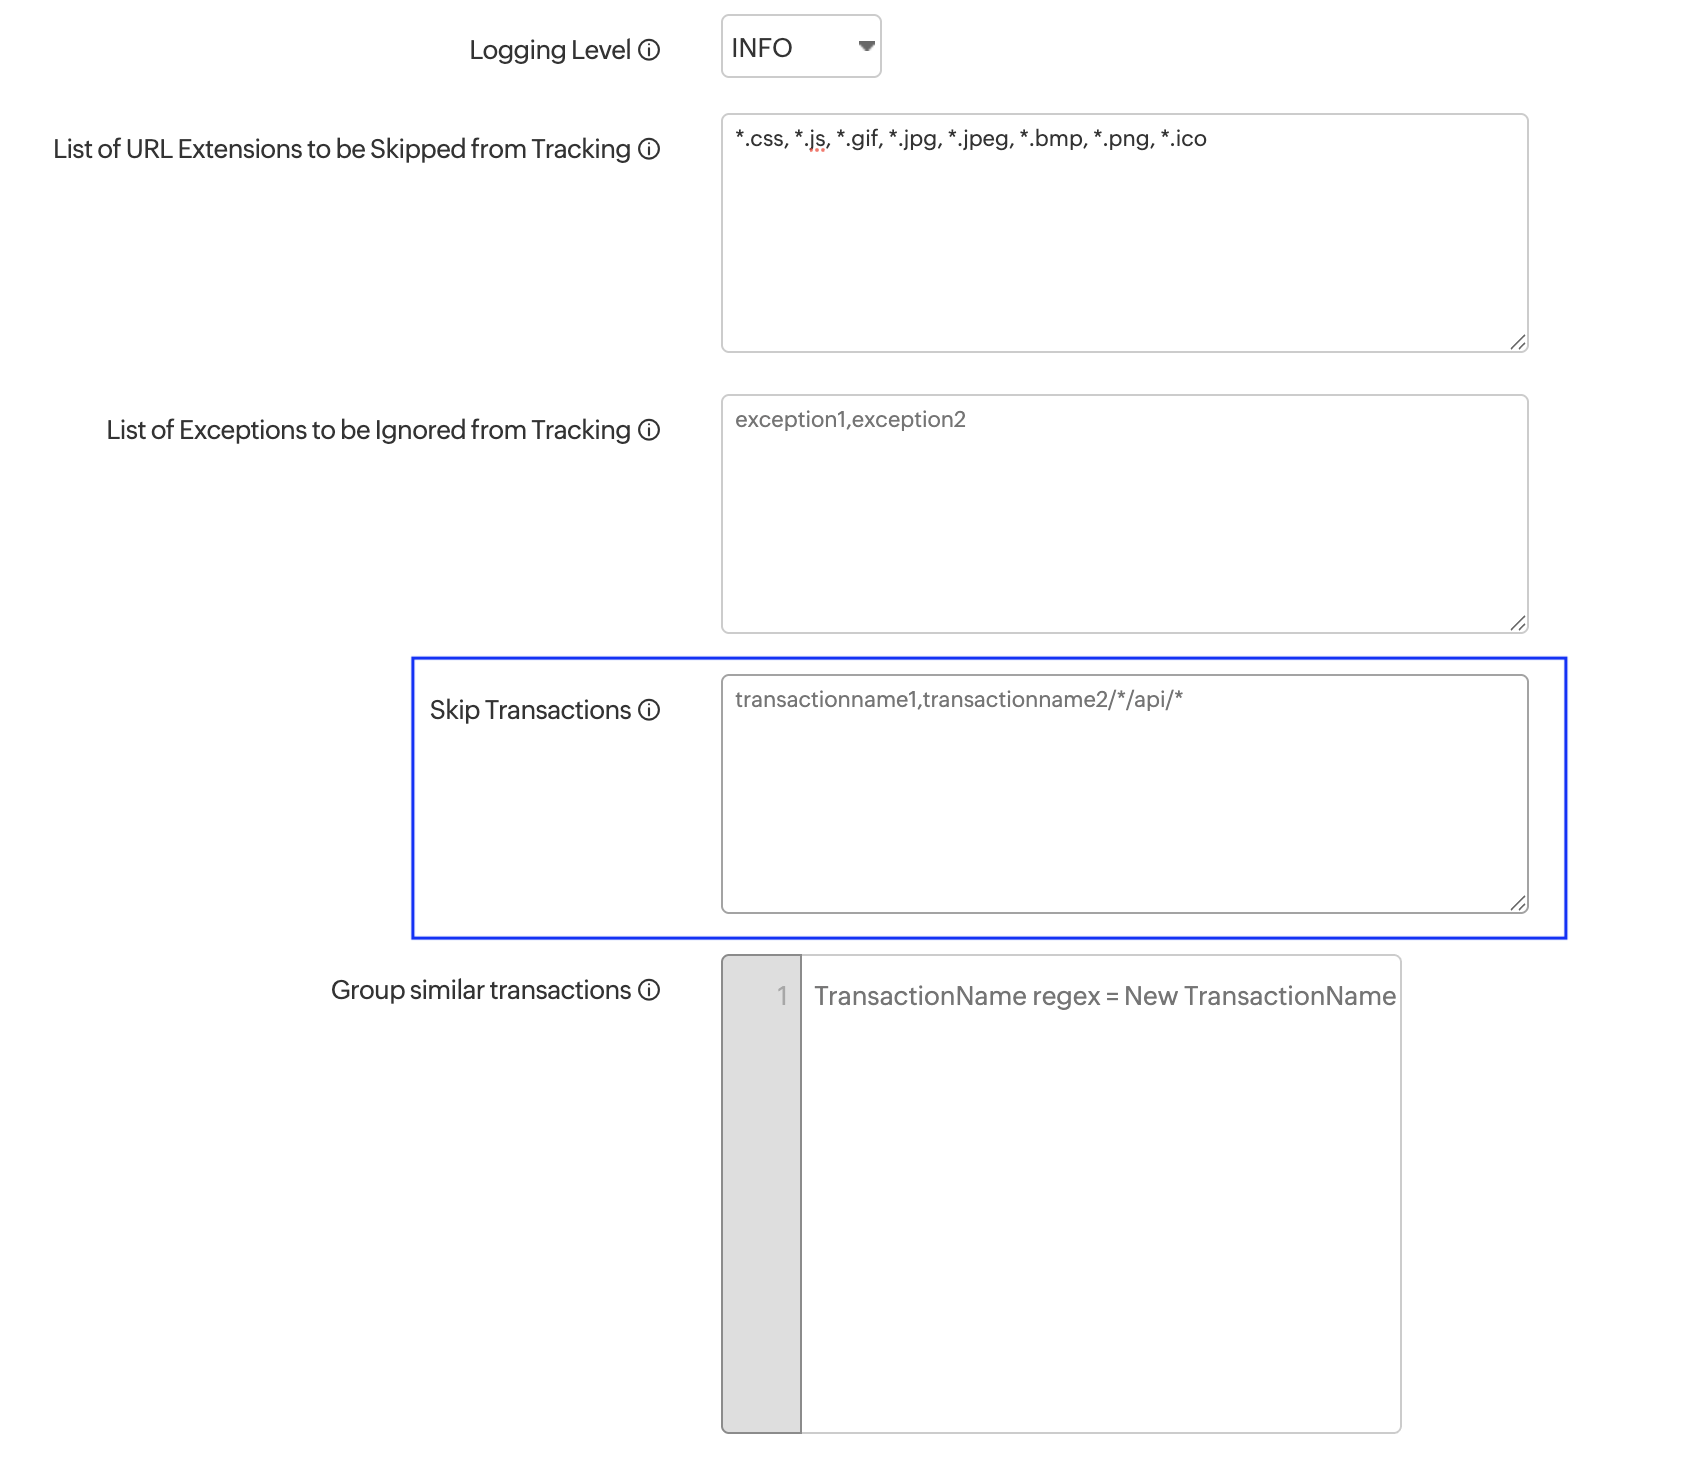
- Click Save.
APM Business Transaction Rules
Define and manage rule profiles to identify business transactions based on specific conditions like headers, status codes, or request paths. These rule profiles can be assigned to individual business transactions or mapped at the application level to apply the same logic across all transactions within the application.
You can configure a rule profile in the Add/Edit APM Insight Application page or the Add/Edit APM Business Transaction page. (default is None).
Users with custom roles can use the View My Resources option to filter and view resources they created.
Add the APM Business Transaction Rules profile
To create an APM Business Transaction Rules profile:
- Navigate to Admin > Configuration Profiles > APM Business Transaction Rules > Add APM Business Transaction Configuration Profile button.
- In the Add APM Business Transaction Rules pop-up, provide the following details:
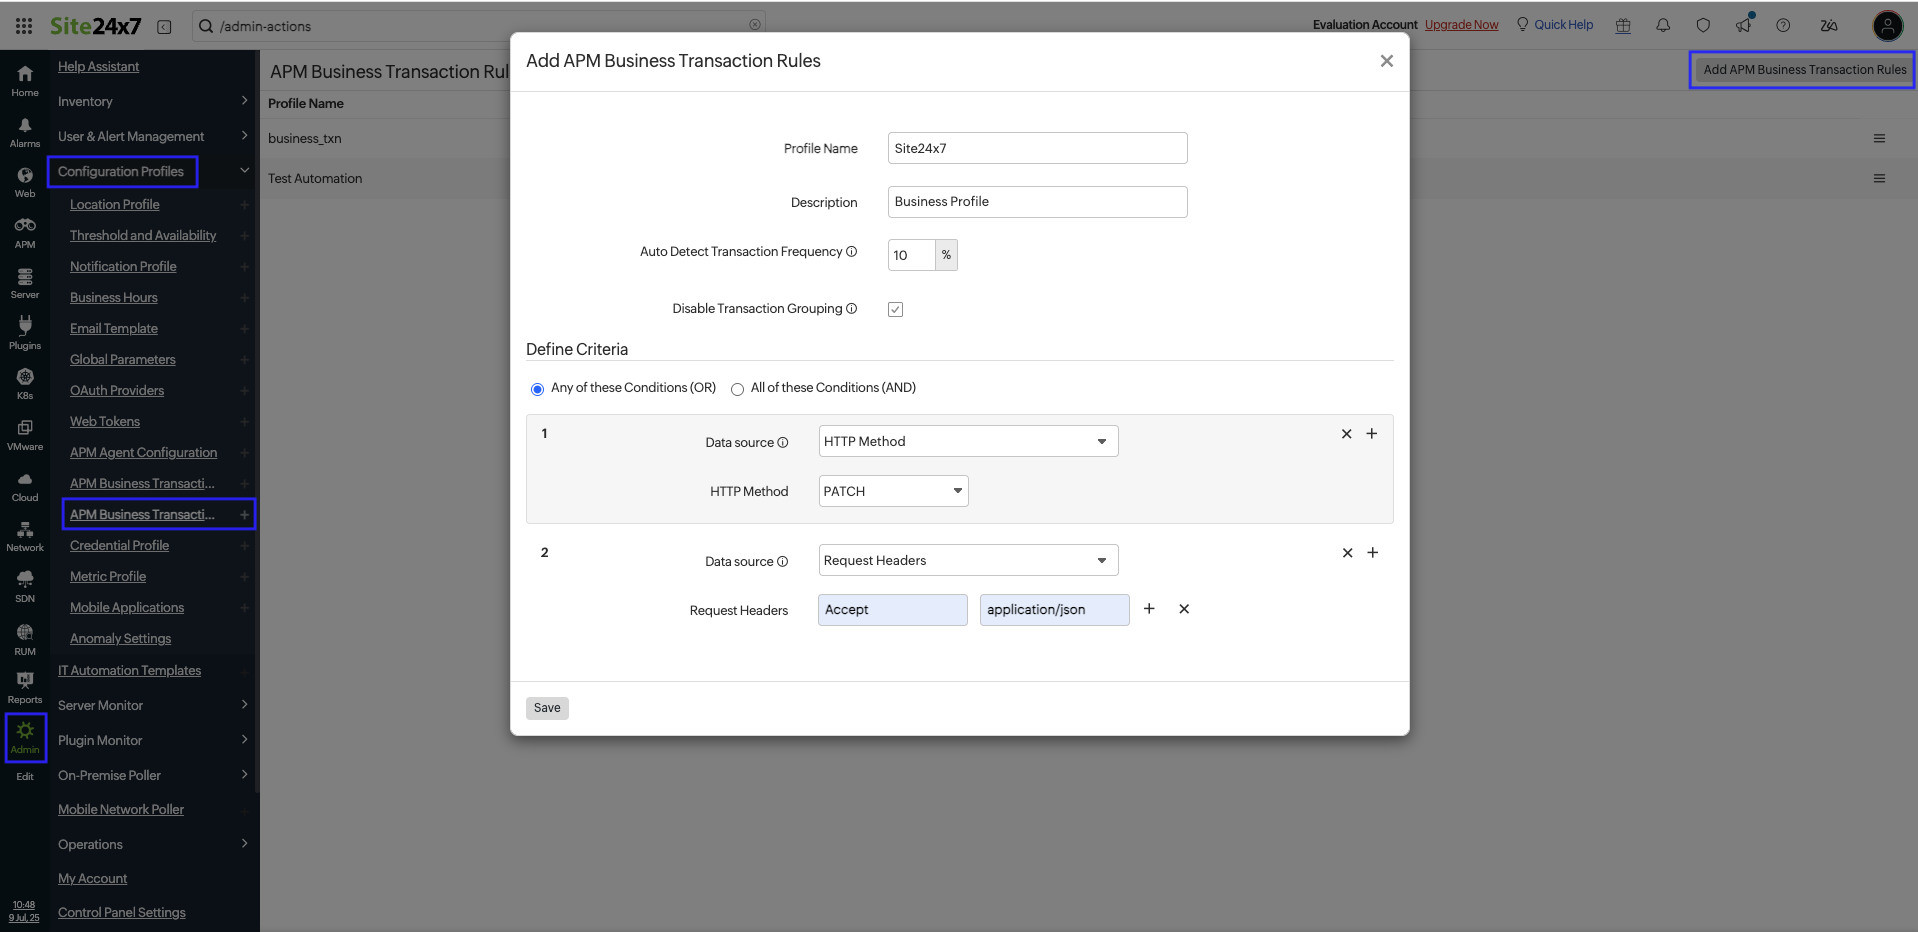
- Profile Name and Description: Enter a name and description.
- Auto Detect Transaction Frequency: Set the percentage threshold to auto-mark a transaction as a business transaction.
- Disable Transaction Grouping: Disable grouping of similar transactions (applies only to business transactions).
- Define Criteria
- Any of these Conditions (OR): Mark the transaction if any one of the conditions is met.
- All of these Conditions (AND): Mark the transaction only if all conditions are met.
- Data Source: Choose where to apply the rule—Request Path, Headers, Method, or Status Code.
- Request Path: Match the rule with the transaction's URL path.
- Request Headers: Match the rule with the transaction’s request headers.
- Response Headers: Match the rule with the transaction’s response headers.
- HTTP Method: Match the rule with the HTTP method used in the transaction.
- HTTP Status Code: Match the rule with the transaction’s response status code.
NoteYou can add multiple data conditions by clicking the plus icon +.
- Click Save.
Once saved, the profile will appear under the APM Business Transaction Rules list, and you can edit it anytime.

Detect Business Transactions
Site24x7 automatically identifies potential business transactions based on internal rule sets and presents them as suggestions under the Auto Detected Business Transactions page. These are not added by default but are shown to help you quickly identify important transactions that may need closer monitoring.
To use this feature:
- Navigate to APM > APM Insight > Applications.
- Click the Detect Business Transactions button.
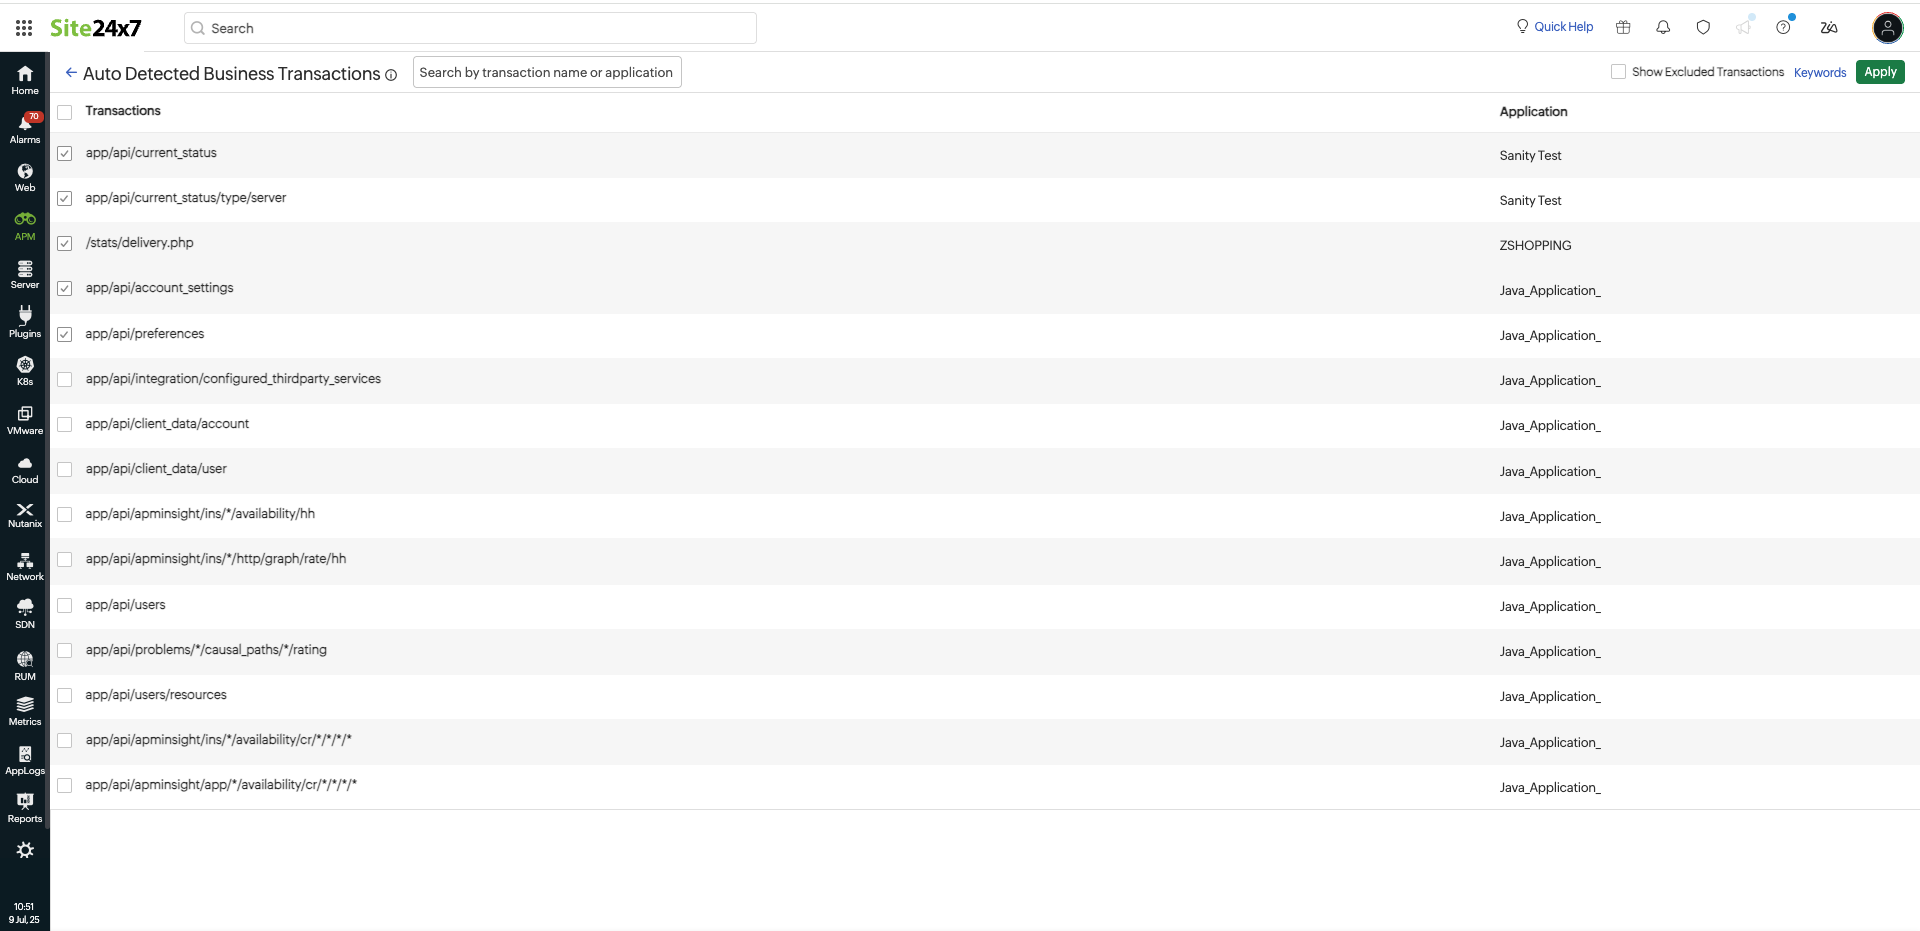
- In the Auto Detected Business Transactions page, Site24x7 will scan your application's transaction patterns and display a list of recommended transactions.
- Under the Transactions column, review the suggested transactions, which will be grouped by their associated application.
- Select the transactions you want to track as business transactions.
- Click Apply to promote the selected transactions as active Business Transactions in Site24x7.
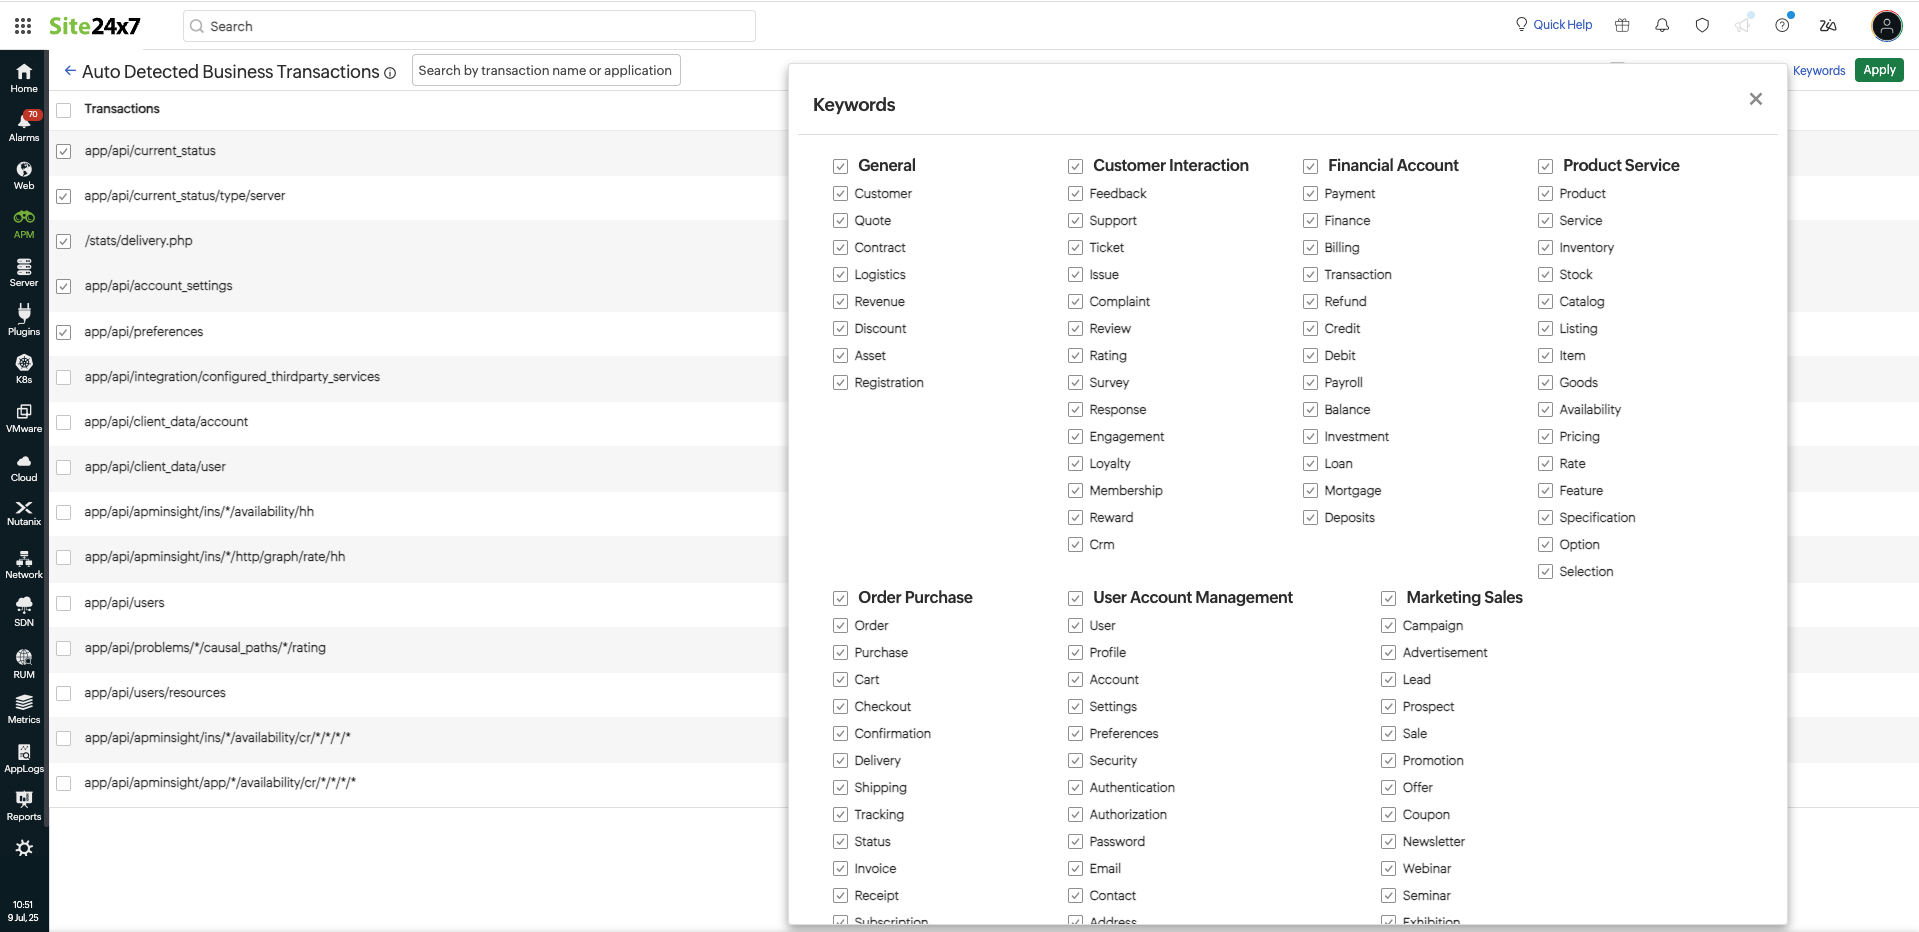
You can also click the Keywords link to view the list of keywords used to generate the curated suggestions. Unselect any keywords that are not relevant to fine-tune the list of detected business transactions.
Select the Show Excluded Transactions checkbox to see the list of suggested business transactions that were previously ignored or left without any action.